Raspberry coulis, blackberry coulis---I could drink with a straw. Something about that tangy, not too sweet taste that makes me crave a small glass of it with a touch of tonic water. The uses of coulis are endless: ice cream, cakes, muffins, sorbets, gelato, and crumb cakes. Normally I crave coulis every other day in the summertime; lately I've been craving it in the cold winter months. Might be my lack of vitamin C? Who knows. Good raspberries, blackberries are hard to come by in my neck of the woods, but luckily at a not too far away Whole Foods, I eyed some precious, beautiful looking blackberries. Knowing I had a long overdue request from hubby to make a "kicked up" crumb cake, these blackberries fit the bill. I doubled up the batched of blackberries to make extra coulis for drinking and baking.
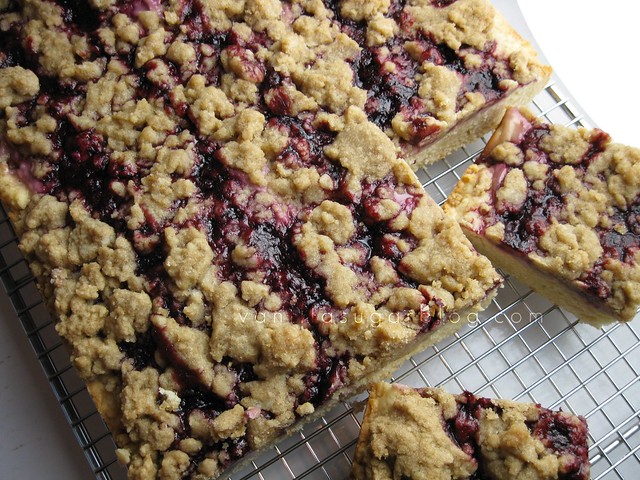
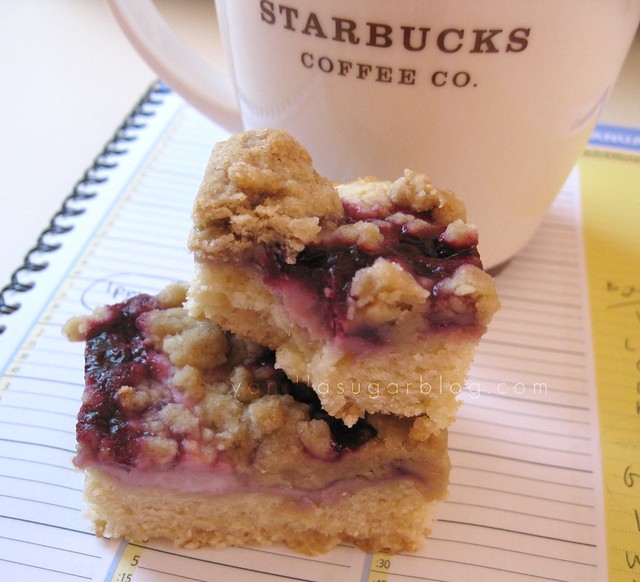
If the thought of this crumb cake looks good to you but the thought of all the steps is changing your mind, please don't let it. The coulis can be made days ahead and kept in the fridge. Really the coulis is the only time-consuming part, as well as the most important, as it really adds a nice, tangy burst to the crumb cake. But the best part of this crumb cake is that the longer it sits, the more flavor-full it gets. All those fabulous different flavors only get more intense as a couple days goes by.
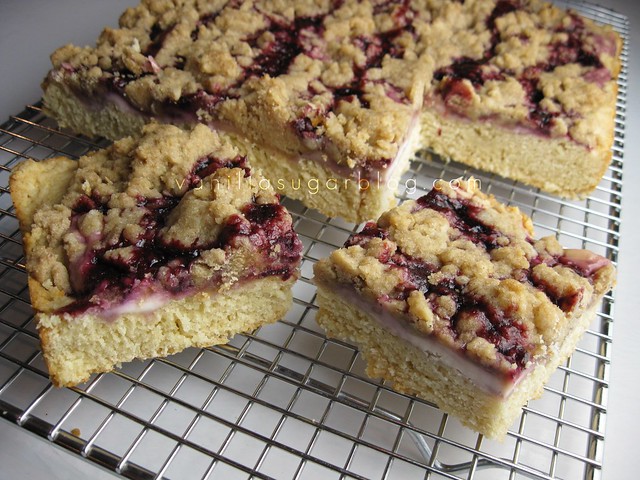
blackberry-cream cheese crumb cake
print recipe
cake:
¼ cup canola oil, plus more for pan
½ stick unsalted butter, melted
2 TB sour cream
2 ¼ cups all-purpose flour, plus more for pan
½ cup + 2 TB granulated white sugar
1 ts baking powder
½ ts coarse salt
1 large egg
½ cup + 2 TB half & half
2 ts pure vanilla extract
crumb topping:
1 cups flour
1 cups packed light brown sugar
¾ ts coarse salt
½ TB ground cinnamon
1 stick unsalted butter, melted & cooled
Cook notes: the batter is very thin. It rises a bit when baking. This crumb cake bakes very fast! So please make sure to check it at the 25 minute mark. It will be hard to see if it’s done with all the layers on there, so use a cake tester to check cake layer. The coulis can be made a couple days ahead of time and stored in fridge until ready to use. It is optional, but wonderful to add in a couple tablespoons of the coulis into your cream cheese mixture. I doubled my ingredients for the blackberry coulis as I wanted a little bit more on the cake and for future use.
blackberry coulis:
1 pint fresh blackberries
2 TB granulated sugar, or to taste
1 TB fresh lemon juice, or to taste
For the coulis:
Put all the ingredients in medium sauce pan and cook over medium (not high!) heat until fruit is mostly dissolved and mixture has reduced a bit as well as thickened up; about 30 minutes or more. Strain through a fine mesh sieve, pushing down on the solids. You might have to let this sit for a while to finish draining—it takes a while. Don’t forget to scrape off the bottom side of the sieve for all the juicy, thickened pulp. Discard the seeds. Taste and add more sugar or lemon juice if needed; it shouldn’t need anything. Cover and refrigerate until ready to serve.
For the crumb topping:
In a medium bowl, combine all dry ingredients, pour melted butter over mixture, and toss with a rubber spatula until large crumbs form. Set aside
cream cheese mixture
8 ounces cream cheese, room temp.
1 large egg yolk
3 TB white sugar
1 TB fresh lemon zest
2 TB or more of the blackberry coulis (optional, but wonderful)
For the cream cheese mixture:
Mix all in a bowl (really well) until ready to use.
For cake:
Place rack in center of oven, and heat oven to 350°.
Lightly butter a 9 x 13 baking pan and dust with flour, and tap to remove excess. (I’ve also used the Pam with Flour and it worked just fine). Set aside. In a medium bowl, sift together 2 ¼ cups flour, add in the granulated sugar, baking powder, and salt; set aside. In a second bowl, whisk together egg, butter, half & half, canola oil, sour cream, and vanilla.
Using a rubber spatula, fold dry ingredients into wet mixture.
Spread batter evenly into prepared pan, and set aside. (to keep batter from sticking to your hand or spoon, just wet or oil your fingers or a spoon and spread evenly throughout pan).
The batter should be about half an inch high. It will cook/rise to an inch thick. (Don’t worry if the batter is very thin and hard to get into the corners, it does spread out as it’s cooking). Use wet fingers to push batter into corners.
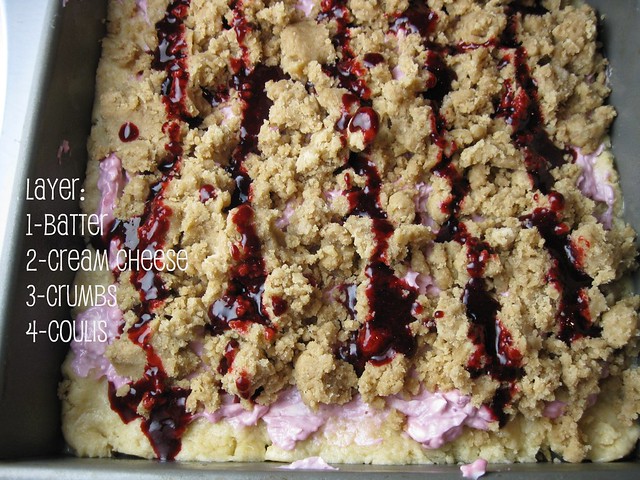
Next put on the cream cheese mixture either in one single layer, clumps or vertical lines. You can make swirls if you want too, I did not.
Next add on the crumbs. Then drizzle on the coulis (if it helps put the coulis in a pastry bag and draw lines).
Then transfer pan to oven, and bake for 14 minutes, rotate pan. Then cook another 10 minutes or until a cake tester comes out clean. Check cake at 25 minute mark for sure. Let cake cool and set up before slicing.
Using a serrated knife or bench scraper, cut into 3-inch squares. Store in an airtight container for up to 2-4 days.
1/29/12
blackberry-cream cheese crumb cake
1/26/12
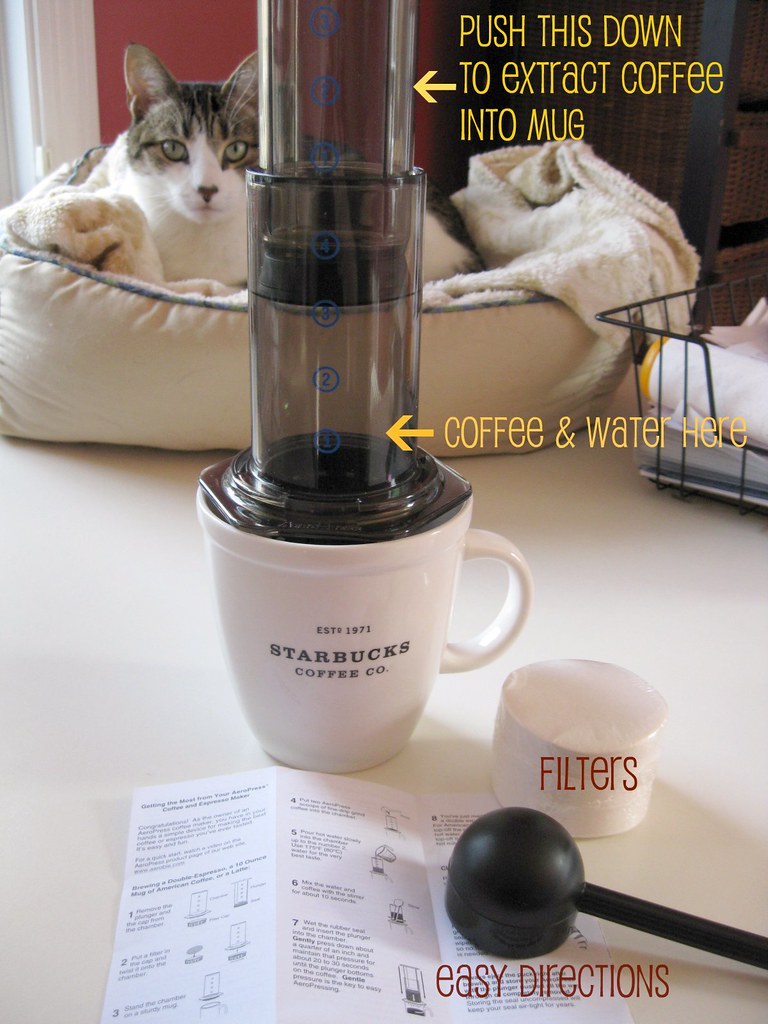
Giveaway: AeroPress Coffee Maker!

Ever get offered to do a giveaway with something you really love? And just can't wait to post about it? I have been so excited to do this giveaway for the longest time. Plus I have one to giveaway to you.
The AreoPress is quite the remarkable little machine. It's absolutely perfect for one cup espresso. Makes more than just one cup too, but since I'm the only coffee drinker in the house it's perfect for me. I love my starbuck via's, but they can get costly. So glad I have an AreoPress now, far cheaper and just as tasty. The espresso is so much cleaner, crisper, and WAY less acidic.
I have to be honest when I first got the package and saw the parts I was a little intimated, but once it's together you are good to go, and cleanup is literally non-existent. All you really have to do is change filter, put in ground coffee, add hot water--just like any other coffee maker. But the flavor is so much better than those awful drip makers that have that bitter, heavy, cigarette-butts-in-water taste.
Trust me, if you like clean, sharp, crisp espresso, then you have to get one. They retail for only $29.99. That's not a bad price at all in this economy.
Don't forget to check out their Facebook page for deals and giveaways too!
All you have to do to enter the contest is go to their website and tell me where you can buy one. This is their website: AeroPress.
ONE entry per person.
PLEASE have a valid email, OR leave your email along with your answer.
The winner will be announced on Friday February 3, 2012. Good luck!
1/21/12
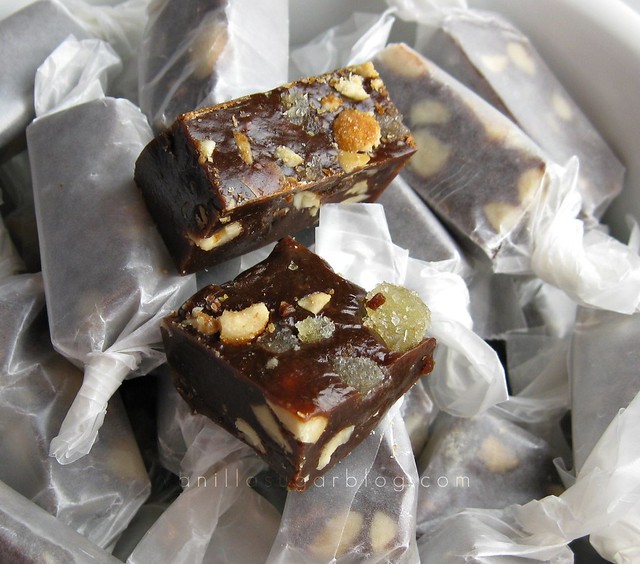
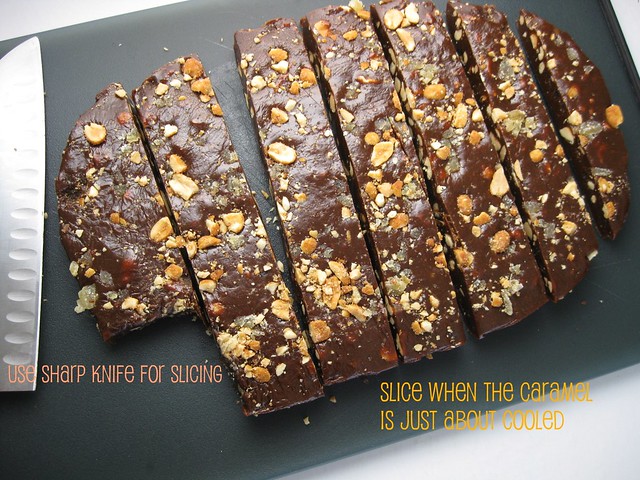
ginger-peanut caramel chews

Those ginger chews made by The Ginger People are good. I buy them every time I go to trader joe's or whole foods. As much as I love them, they burn a hole in my pocket. Had to find a much cheaper way to devour them. So, why not try and make my own.


Pour caramel into buttered glass or ceramic dish. Don't touch! Let cool a bit before slicing.


ginger-peanut caramels
print recipe
4 TB salted butter
Extra butter to grease ceramic dish
3 ounces high quality bittersweet chocolate, chopped
1 cup half & half
½ cup light corn syrup
½ cup molasses
1 cup white sugar
1 ts high quality vanilla extract
Giant pinch of sea salt
½ cup of honey roasted peanuts, rough chop
¼ - ½ cup candied ginger, diced fine
Wax paper squares for wrapping caramels
Extra butter for greasing up your slicing knife
Cook notes:
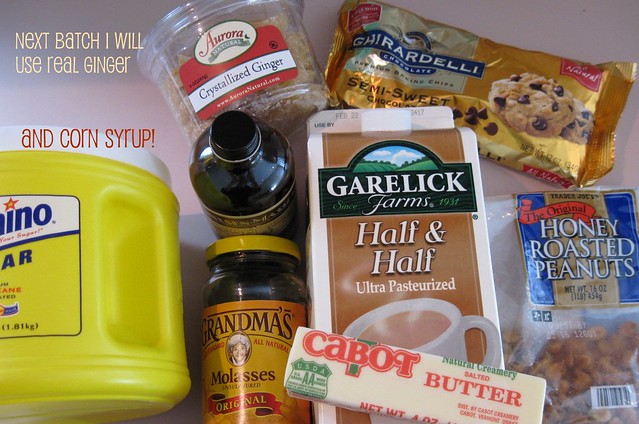
Remember this is hot sugar, never touch the hot sugar, never be tempted to taste test, and always use oven mits. The next time I make this I will use real ginger root. The ginger in the candied ginger was not that strong. And I think real ginger will add a nice, strong, deep flavor. I used honey roasted peanuts for that extra flavor and texture. Of course you can use regular peanuts if you like or even pecans.
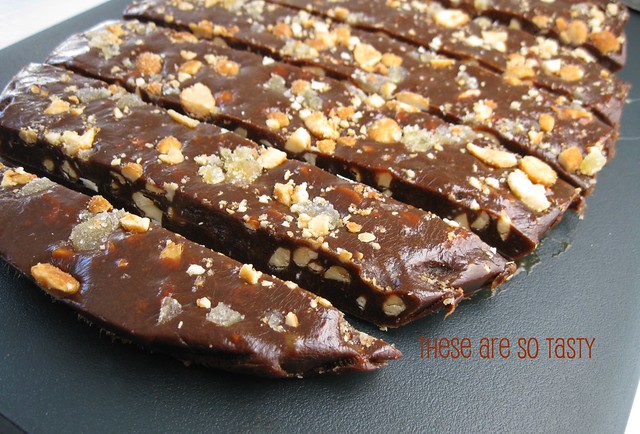
I found it was a lot easier to slice the caramels when the mixture was almost cooled and set. It’s best to wrap these in wax paper. If you don’t wrap them, they will stick to each other when you store/stack them away. Make sure to work fast when you are at the last stage of adding in the add in’s. The caramel sets up fast and needs to be poured as soon as possible. So it’s handy to have your add in’s right at the ready.
Butter an 8-by-8-inch or 8 x 9 baking dish. Get out a candy thermometer and clip onto pot. Get your minced ginger and chopped peanuts ready, set aside.
In a large heavy duty pot (with high sides preferably) combine the butter, chocolate, milk, molasses, sugar, and salt. Place over a medium heat and stir constantly and CONSTANTLY scraping the bottom of pan. (You will be doing this for a while). Let it boil and cook until the temperature reaches around 247 -249 (soft ball stage). Once it hits this temperature remove from heat
And add in the vanilla extract (it will make a lot of noise and sizzle).
Just add in and stand back then stir in. Next, working fast add in your ginger and peanuts, and give it a good stir.
Once mixed, pour the hot mixture into your prepared buttered baking dish.
In about an hour or 45 minutes you should be able to handle caramel. Gently lift if out of baking dish and transfer to a wooden board or plastic cutting board.
Using a sharp knife cut long strips about ¾ of an inch, then cut those strips into 1 or 2 inch pieces.) Wrap in wax paper.
Should make about 70 pieces; all dependant on how you cut them (what size).
1/19/12
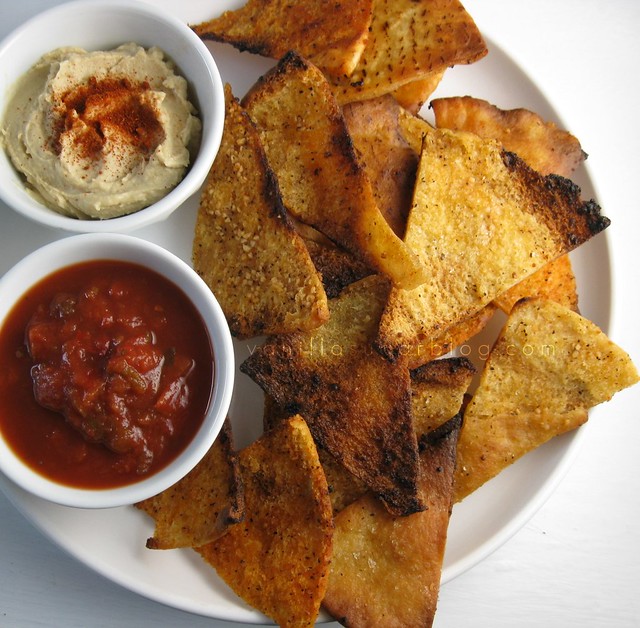
crispy coated pita chips (with lots of coating!)
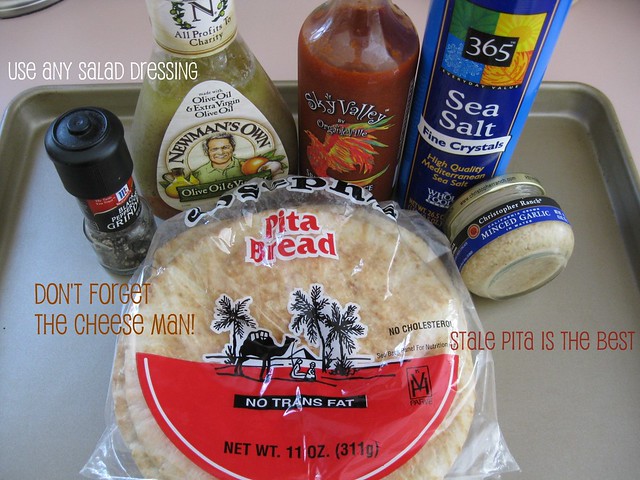
Being that we're all foodies here, I'm so sure that you, like me, are very guilty of over-buying groceries, knowing that when you buy them you are MOST certainly going to use them straight away. You get home with all your groceries, happily and proudly placing them in their respective compartments; feeling good about placing them there and then order a pizza. Yes? Happen a few times to me too. The pita bread in this recipe are such a story. And of course pita goes stale very quickly and you have to use it right away or store in the freezer to never be seen again until you start some crazy fad diet and are starving, thus looking into the freezer many months later for FOOD.
The pita was stale a few days later and I was NOT going to throw them out, so the idea of homemade pita chips came into my mind. Never having made them before, I wasn't sure what coating should or should not go on them. And what I found out was literally any coating can go on them---the pita is the sponge to all things spice, sweet, savory, and a combo of any. Excellent.
I had always wanted to REMAKE the pita chip (much like the Dorito chip) that has a LOT of stuff on them. I absolutely hate buying pita chips (new or new/improved flavors!), with great expectations, only to open said bag and realize it's just a pita chip with a gentle coating or salt and some untraceable spice. Where's the coating? I am not going to consume calories for nothing--give me coating or give me death! Ok, not death, but give me my money back so I can go home and make my own.
What learned creating these tasty lil nuggets? I learned that unused salad dressing, and I know you all have at least 4-5 bottles just sitting away in your fridge right now waiting to be used, makes the best coatings. You knew that already though? I didn't. Salad dressing, along with a little garlic, maybe a little cheese, and maybe a little heat too. Easy peasy. BUT the best part? I think most of you will agree here on this one: you can make your pita chips a little on the burnt side. Oh yeah. I LOVE a the occasional burnt chip. Heavenly. Right?

extra coated pita chips
print recipe
package of pita bread, sliced into triangles
salad dressing (whatever salad dressing you want or oil & vinegar)
2-5 TB chopped garlic (use as much as you desire)
a few dashes of hot sauce, optional but wonderful
2-5 TB Parmesan cheese (or whatever cheese you want), grated fine
salt & pepper
Preheat oven to 400 degrees. Line a baking sheet with parchment paper.
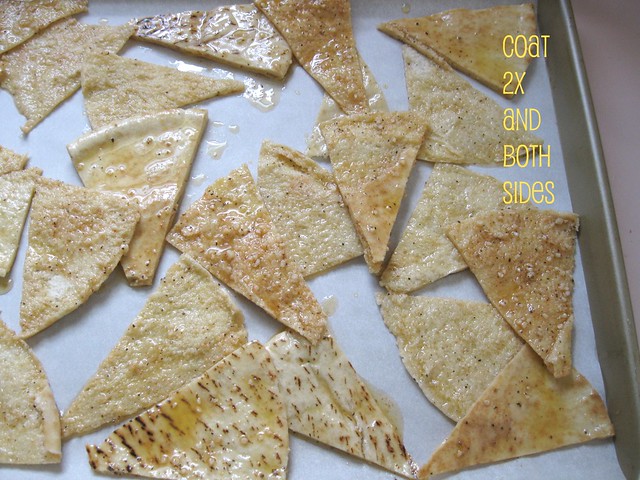
In a large, but shallow bowl mix all the ingredients well. Take the pita chips and dunk them in bowl one by one or using a thongs many at a time. Make sure to coat them well. You will need to keep stirring the mix since the oil will keep going to the top and the stuff sinking to the bottom. Place them on the baking sheet, leaving enough room in between to let them crisp up.
Bake for about 10-15 minutes or until they are browned; I like mine a tiny bit burnt so I baked them longer. They cook up fast, so don't leave the oven! Let them cool a bit before eating.
They keep a few days in plastic ziplock bag. Have no idea if they freeze well; I doubt it.
1/15/12
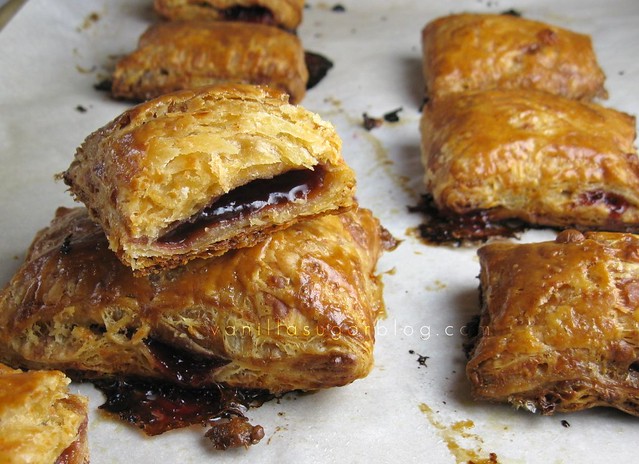
raspberry-cheddar hand pies
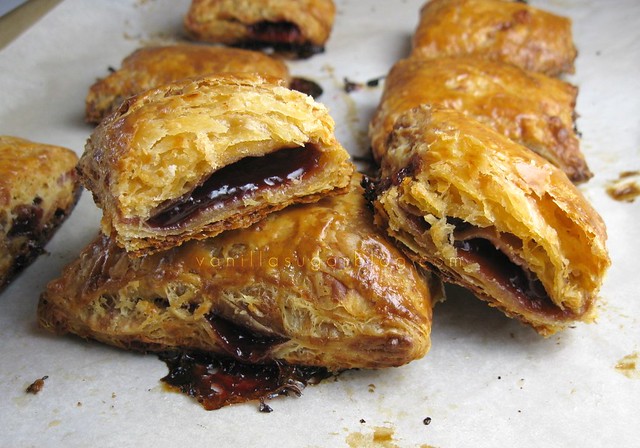
I finally found a very good, I mean really good, cheddar hand pie crust. For years I've always made my own UNTIL the talented folks at King Arthur Flour bestowed upon me their own recipe. Wow. It's really that good. Originally King Arthur used it for breakfast hand pies, which is a fabulous idea, but I used mine for a cheddar hand pie filled with jam. I love the idea of cheddar and fruit. Always had a slice of sharp cheddar cheese along with my apple pie--even made apple pie with cheese in--oh so fabulous. To be honest I was going to use apples inside this one, but didn't have enough apples, so I just used whatever was in the fridge.
When I eat croissants I LOVE to put raspberry jam on them--it's such a great combo.
But really you could fill these hand pies with anything--apples, scrambled eggs, stir fry veggies, brie, figs, chutney....endless possibilities. Keep in mind that this dough is really only for hand pies, I do not think this would work well as a pie crust since it puffs, a lot. I think the next batch well have some sort of chutney in them--doesn't that sound good? What do you think about chocolate? I'm in.
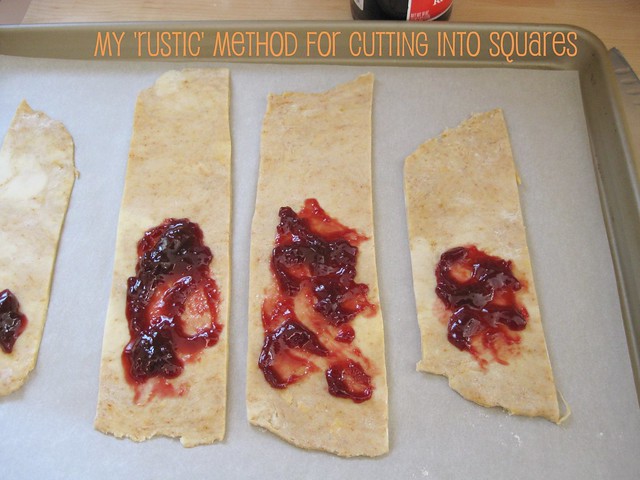
This is where I take shortcuts when it comes to cutting out squares. It works though!
raspberry-cheddar hand pies
from vanillasugarblog.com
crust from King Arthur Flour
print recipe
Cheddar crust
3 cups King Arthur Unbleached All-Purpose Flour
3/4 cup Hi-maize Fiber (or substitute all-purpose flour)
1/2 cup Vermont cheese powder (or substitute ¼ cup fine-grind Parmesan cheese)
3/4 teaspoon salt
¾ teaspoon paprika
1/4 teaspoon cayenne pepper or a dash of hot sauce, optional
1 1/2 cups (24 tablespoons) cold butter, cut into pats (I grated mine, kept them frozen)
1 cup shredded sharp cheddar cheese
3/4 cup ice water
Filling
Raspberry jam (or whatever filling you want)
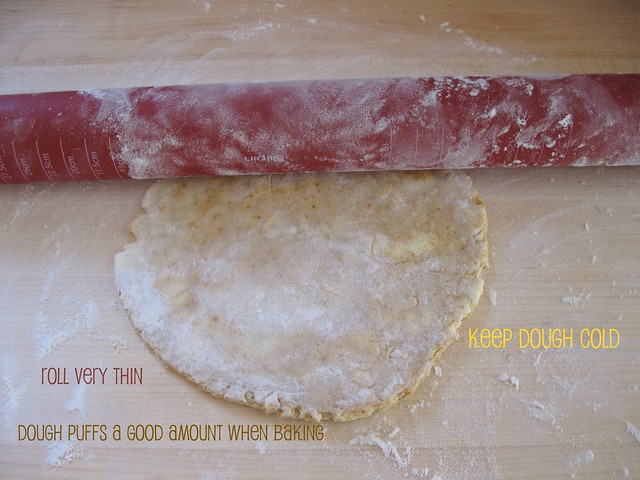
Cook notes: I made this without the hi-maize fiber using flour instead, and used parmesan instead of cheese powder. BUT I highly recommend using/finding the sharp cheese powder because I’m so sure that adds a nice flavor and the parmesan makes it a little more greasy. I separated this dough into 5 mounds and only used one mound for the fruit pies, and freezing the rest. Does it freeze well? Yes. For the square-like hand pies, I rolled my hand pies into long squares, but use any shape you want—keep in mind that the dough should be as thin as possible since it does rise a bit when baking. Always keep the dough cold when working with it and always work the dough as little as possible as we want a nice crispy crust. The more you work the crust the chewier and less tender it will be.
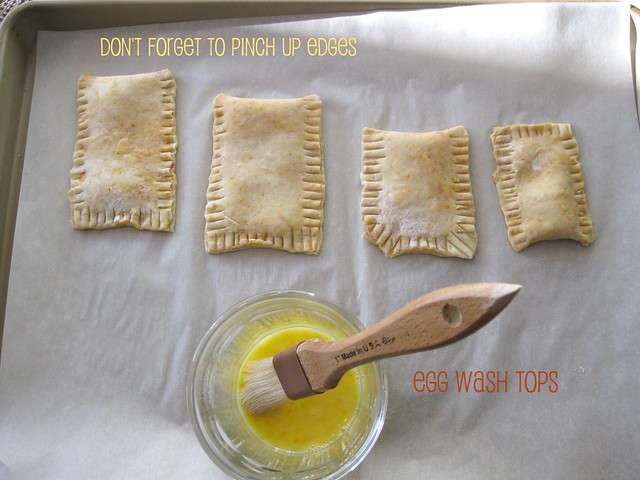
In terms of cutting out dough squares for perfect sized hand pies? -- I’m horrid at this, so I just cut them into long strips and filled one half and folded over the other half (as seen in the photos). It’s rustic, but it works for me. If you have a better way, then please go ahead.
To make the crust: Combine the dry ingredients. Work in the butter until the mixture is unevenly crumbly.
Add the cheddar cheese and water, mixing until the dough is cohesive; add extra water, if necessary, to make it come together. It will be crumbly, that’s ok, just mold them into mounds and cover with plastic—it will come together when it sits/sets up in the fridge. If you are using dough right away chill at least 30 minutes or more. If you are not using all of them right away then freeze the rest.
Preheat the oven to 400°F. Remove a disk of dough from the fridge. Roll it into as big a square/rectangle, as you can. Using a sharp knife, slice out little squares (whatever size you want).
Fill the middles with about 2 teaspoons of raspberry jam. Take a square and place on top, seal up edges with a fork by pressing down or pinching if necessary.
I brushed the whole tops with the beaten egg before baking. Making a vent hole is NOT necessary.
Place on a parchment-lined baking sheet and refrigerate while making the other hand pies. You always want to keep the dough as cold as possible.
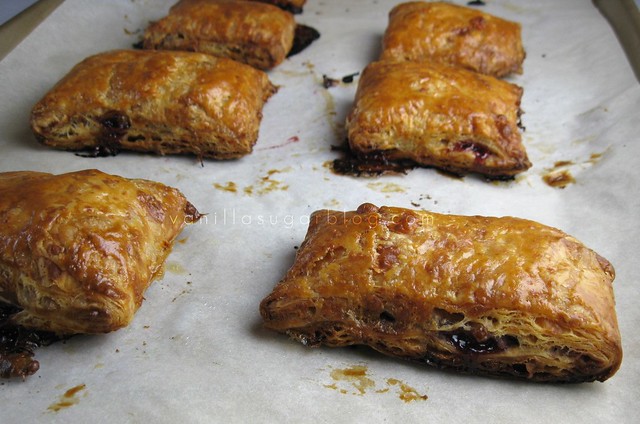
Bake the pies for 18 to 23 minutes, until golden. Remove from the oven, and cool before eating as the filling is HOT.
1/12/12
guest post: gooey chocolate chip sandwich bars w/ cranberry
I was delighted to have the creative genius Joanne of the wildly creative with healthy edge to it blog called 'eats well with others'. I am drawn to Joanne and her baking & cooking ways because she, unlike me, has a healthy edge (I need to get my baking-healthy edge on) . When this girl isn't creating amazing healthy yet definitely delish recipes in her nyc kitchen, you can find her exercising; well, exercising to the extremes honestly. I've lost count on how many marathons she's done. I was able to stop counting her marathons this past fall when ironically, she and I were both nursing knee injuries. Jokingly we would tease each other via twitter on who had the worst cabin fever since knee injuries take their own sweet time to heal. Oh did I mention she also is in the process of getting her MD/PhD? Yeah. The woman has crazy energy, and insane passion; I just love that about her!
A couple things I wanted to know:
You seem to have a mainly ‘healthy edge” to all your recipes, where or when did this start?
My family is the quintessential meat and potatoes family so I grew up on absolutely zero vegetables and lots of bread and cannoli. I started eating more healthy my junior year of college. I kind of woke up one day, realized just how overweight I was, and decided I was tired of being “the fat girl” among all my friends. Dining hall food isn’t the best for getting healthy and so I started to cook for myself. Since then, it’s pretty much been history. I fell in love with vegetables and, a year ago, stopped eating meat entirely. I still have a pretty intense sweet tooth so dessert will always be a part of my life, but I try to eat uber healthy the rest of the time to make up for it.
Do you plan out what you’re going to make? Or are they spur of the moment?
I am quite the stereotypical medical student in the sense that I am an organizational freak...however, I use those OCD tendencies to menu plan instead of study plan. It happens. Occasionally when I get a craving or inspiration hits, some spur of the moment cooking gets done, but most of the time there’s a plan and I follow it. Or sushi gets ordered.
When looking at recipes to try or create next, what sparks your interest most?
I definitely have certain flavor profiles that jump out at me. I love very bold, spicy food so anything Indian, Thai or Middle Eastern always appeals to me. I also have a strong and definite penchant for orange vegetables. If you show me a recipe with a sweet potato or winter squash in it, I am about 1000x more likely to make it. If it has celery...then there is no chance in hell it will come anywhere near my kitchen.
What country would you like to visit most for their food?
I would love to go to Thailand, Morocco or India. Although, my roommate just brought an intestinal parasite back with her from India (Giardia) and so my desire to go has declined a bit.
Are there any junk foods you love?
I’m a Reese’s-aholic. And a nutella-aholic. Although, I wouldn’t consider nutella a junk food. It’s more of a food group.
Favorite health foods?
Sweet potatoes, winter squash, and apples. I seriously eat an apple a day. Honeycrisp are my favorites!
What was your favorite food to write about?
I love writing about cupcakes. They’re my favorite thing to bake and one of my favorite things to eat. There are just so many cupcake/frosting/filling combinations and you really can’t go wrong with any of them.
Below is one of Joanne's recipes. For more info on her and her recipes check out her food blog: eats well with others.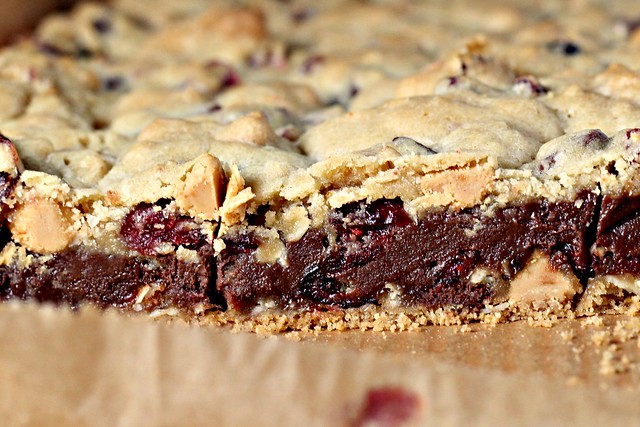
My mom always used to tell me that you can catch more bees with honey than you can with vinegar.
It was her quaint way of saying, "I know you're thirteen and have an attitude problem, but if you want me to drive you to the mall then you really probably should take out the garbage. And do the dishes. And clean your room."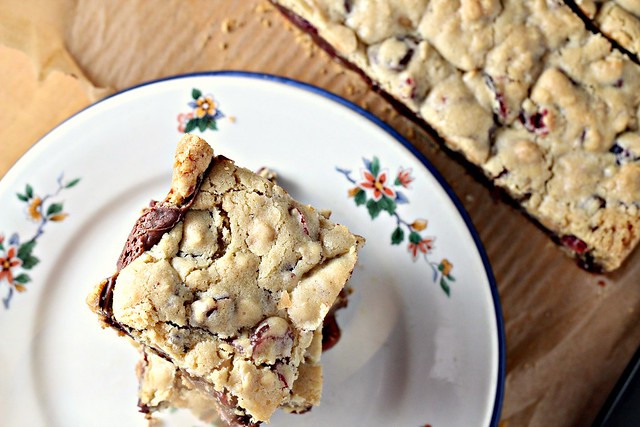
I just didn't get it though.
Why would anyone ever want to catch bees?
And given how much time my mother spent swatting at them all summer long, why weren't we dotting vinegar below our ears and on our wrists until we smelled like balsamic vinaigrette (yum) to try to keep them away?
She is such an enigma.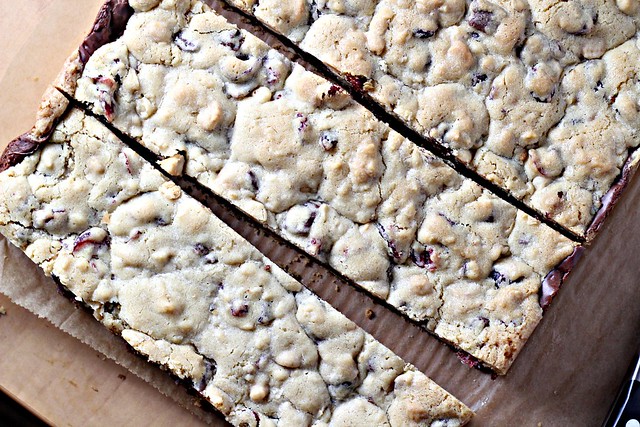
However. If she had said, you can make more friends when you sandwich fudge in-between two layers of chocolate chip peanut butter chip cranberry cookies than you can if you try to give them bran muffins?
That, I would have understood.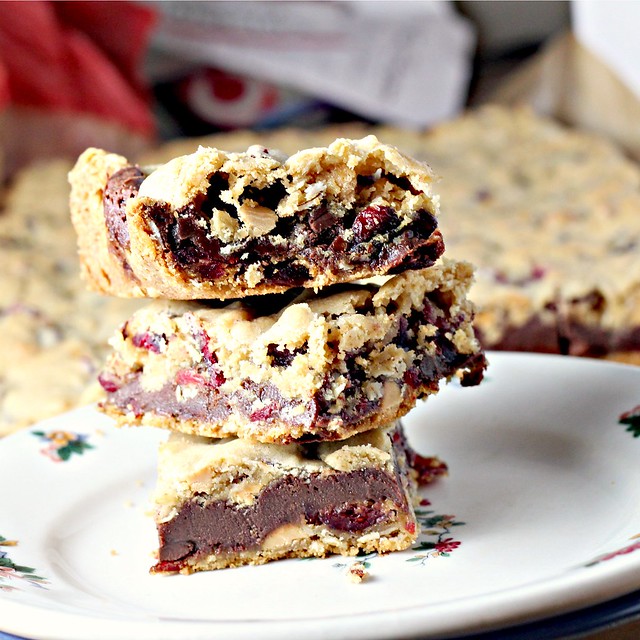
Nothing against bran muffins. But they don't say "love me always and forever" as much as gooey chocolate chip sandwich bars do. Truth. I speak it.
Gooey Chocolate Chip Sandwich Bars
adapted from Food and Wine
print recipe
Ingredients
• 2 cups AP flour
• 1 cup old fashioned rolled oats
• 1 tsp baking powder
• 1 tsp baking soda
• 1 tsp kosher salt
• 2 1/2 sticks unsalted butter, room temperature
• 1 cup light brown sugar
• 1/2 cup granulated sugar
• 1 large egg, room temperature
• 1 large egg yolk, room temperature
• 1 tbsp pure vanilla extract
• 3/4 cup semi-sweet chocolate chips
• 3/4 cup peanut butter chips
• 1 1/2 cups dried cranberries
• 2 cups semisweet chocolate chips
• 14-oz can sweetened condensed milk
• 2 tsp pure vanilla extract
Instructions
1. Preheat the oven to 350. Lightly grease a 9x13-inch baking pan. Line the dish with parchment paper leaving 1-inch of overhang on either side.
2. In a medium bowl, mix the flour with the oats, baking powder, baking soda and salt. In a stand mixer fitted with a paddle attachment, cream together the butter and sugars until light and fluffy. Add the egg, followed by the egg yolk and vanilla, scraping down the sides after each addition. Beat in the dry ingredients, then add 3/4 cup chocolate chips, peanut butter chips and dried cranberries until just incorporated. Set aside.
3. In a small saucepan, melt 2 cups chocolate chips in the sweetened condensed milk over low heat, stirring constantly, until smooth and thickened, about 3 minutes. Remove from the heat. Stir in the vanilla and let cool to room temperature.
4. Press half the cookie dough into the prepared baking dish. Pour the cooled chocolate mixture over the dough and spread evenly. Top with small dollops of the remaining cookie dough. Bake for 20 to 25 minutes, until the top is lightly browned. Let cool completely before cutting.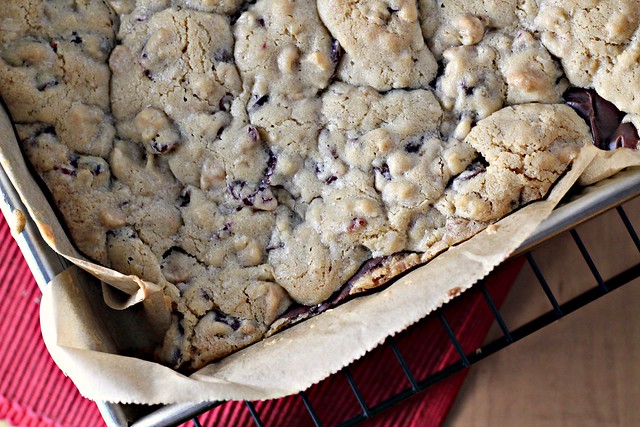
1/8/12
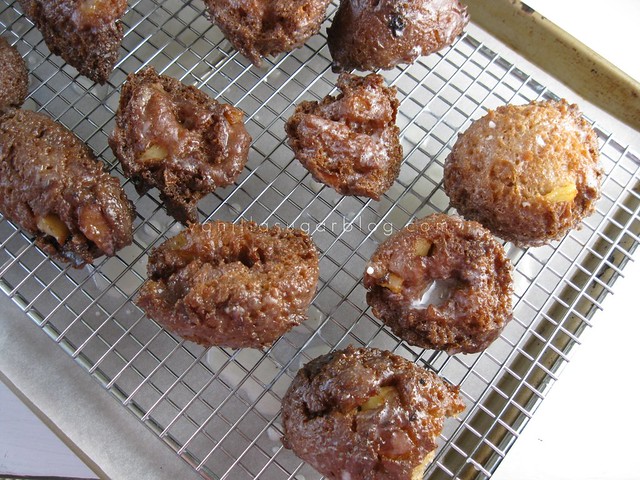
apple fritters
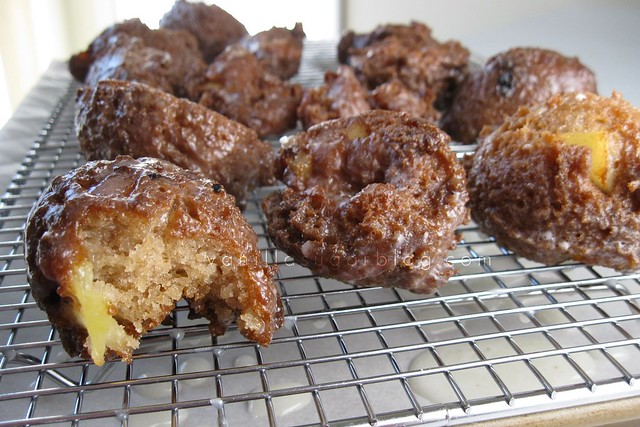
Extra crunchy apple fritters mind you. Just have to have my apple fritters done extra crunchy. It's that crunch mixed with that sweet sugary glaze--the perfect bite. A bite that gets the saliva, in the back of your mouth running full time because it knows whats coming and it is so ready! That first bite of warm, crisp, apple fritter covered in a sugary sweet almost hardened glaze? Oh yeah baby. So happening. These--are way better than any fair fritters.
Do me a favor? Make these next weekend. Trust me everyone in the house will come to the table for these. They are not too hard to make; the only hard part (if you want to call it hard) was the the deep frying. But all you have to do is test a small batch first and see if the dough is ready. Then all you have to do is just set up camp at the fryer and watch them. Do not walk away from the fryer as these cook up fast; depending on the size. I got this recipe from pioneer woman. , only made a few adjustments and made mine fritters a bit bigger. I used pink lady apples as they are sweeter with more tart--I really wanted to taste an apple-ly like taste to the fritters knowing I was going to make them extra crunchy. But feel free to use whatever apples you like.


apple fritters
adapted from pioneer woman
print recipe
fritters
2 cups AP flour
½ cup white sugar
2-1/4 ts baking powder
1-1/4 ts salt
2 ts cinnamon
2 large eggs
3/4 cup whole milk
2 ts vanilla extract
3 TB melted butter, cooled
2 regular size pink lady apples, peeled, rough chop (use any apple you like)
glaze
2 cups confectioners sugar
1/4 ts salt
1/4 cup PLUS 3 TB half & half (or more depending on how thick or thin you like glaze; I like mine thick)
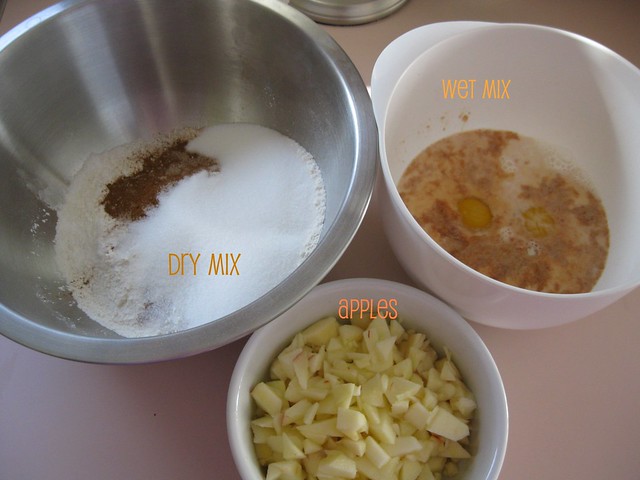
In large bowl, combine flour, sugar, baking powder, cinnamon, and salt.
In a separate bowl, mix the eggs with milk and vanilla extract, then add in cooled melted butter; mix well.
Fold in the dry with the wet ingredients; only mix till just combined. Lumps are fine. If you overmix you will have tough chewy fritters—that’s a no no. Next fold in the chopped apples.
Heat about 3-4 inches of canola oil over medium to medium-low heat.
When it gets hot, drop a little drop of batter into the oil. If it sizzles immediately and rises to the top, the oil is ready; if it burns quickly, turn down the heat.
Drop oversized tablespoons of batter (using an ice cream scoop, medium size, helps a lot, if you don’t have an ice cream scoop you can use two spoons to roll out the scoops of batter) into the hot oil. Only do about 3 -4 fritters at a time. They cook fast about 1-1 ½ minute per side or if you want extra crispy about 2 minutes per side—if that? Make sure to flip them.
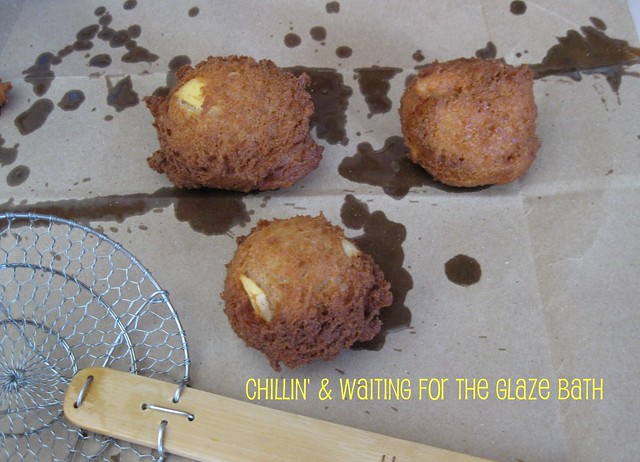
Remove and drain on a paper towels or brown paper bags. Let these cool a bit before the glaze bath.
For the glaze:
Mix all the glaze ingredients together in a medium sized bowl. Mix well. Then quickly dunk each fritter and let them rest on wire rack with cookie sheet on bottom to catch drippings.
Don’t let the fritters sit too long in the glaze as they will get soggy.
1/5/12
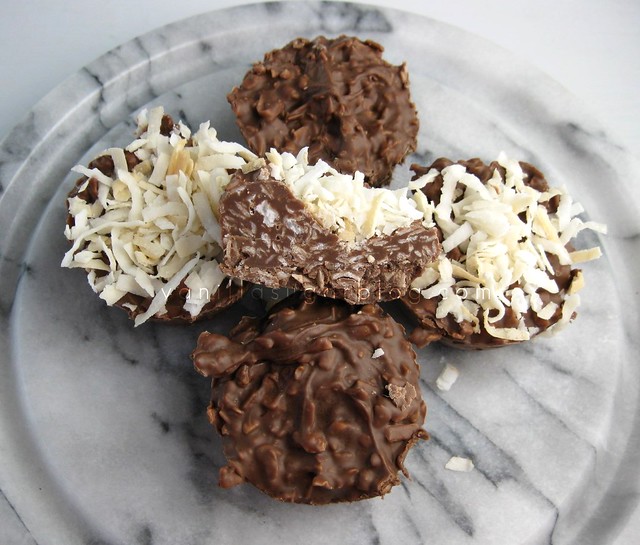
coconut clusters
Do you have a favorite homemade candy shop? I do. It's gross really how much money I dropped at the last visit. And the people that work there 'almost' know me by name. Sad. Let's blame it on winter and winter time makes people eat more carbs. Sounds right. Stage Stop Candy in Dennisport, MA makes the best peanut butter logs and coconut clusters--oh of course many other things, but those two are the main reasons I go there (and the occasional sea salted Tahitian vanilla caramel).
AND congrats to the winners of the Sweets on a Stick Cookbook giveaway. Tree #8, Janet Rudolph #59 and Cake Duchess #66. Please email me your address so we can get these books out to you. CONGRATS!
Also, Jen of Duluth, GA (#62) you were the winner of the Nescafe Piccolo Giveaway. You still haven't contacted me and only have a few more days left before I choose another winner on Monday Jan 9, 2012. Please email me ASAP Jen!


coconut clusters
print recipe
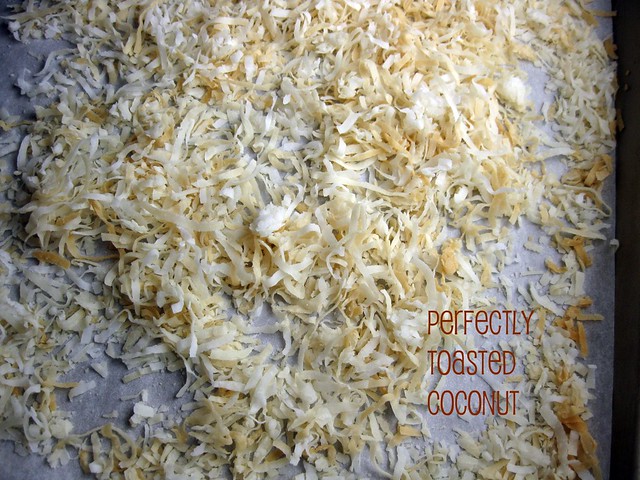
7 ounces of toasted coconut*
11.5 ounces of high quality milk chocolate (you could try dark chocolate)
A pinch or two of sea salt
Cook notes:
*Toast your coconut on a parchment lined baking sheet in a 250 degree oven for about 15-25 minutes. You will have to toss the coconut around on the baking sheet a couple times during cooking; this prevents uneven browning. You know the coconut is done when the coconut is a very light golden brown—this is when to take it out of the oven. The coconut gets dark fast! So watch it at the 15 minute mark.
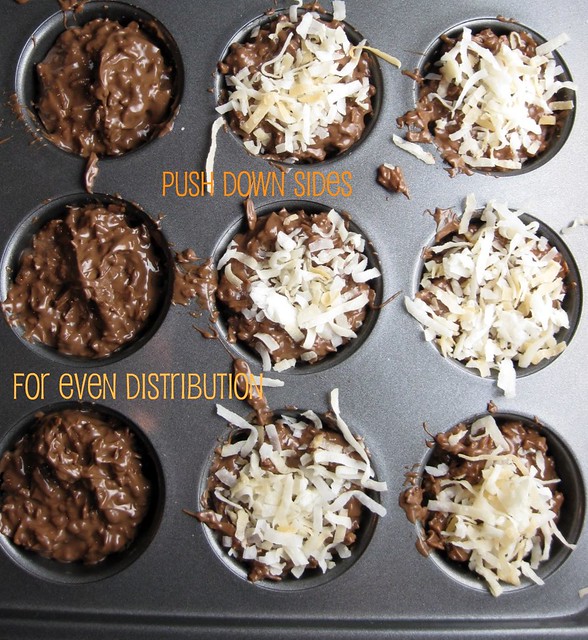
I used mini cupcake pans to make even, round clusters. Use whatever mold you like, just make sure you use liners or non stick spray or even silicone molds since the chocolate might stick to the pan.
If it does stick all you need to do is put the pan in a larger pan of warm/hot water for a few seconds to a minute. This should loosen the bottom a bit and you will be able to lift them out. Do not let it sit in the water too long as they will melt. If you want to decorate tops of clusters with toasted coconut then save a little on the sides.
To make clusters, take cooled toasted coconut and mix with about 11.5 ounces of melted/tempered milk chocolate. Sprinkle a couple small pinches of sea salt. Mix well, then transfer to your molds. Push them down into molds to make even and get out the air. This would be the time to sprinkle the tops of the clusters with the saved toasted coconut, if desired. I did a few, not all. Let cool/harden at room temp then finish setting up in fridge.
Should make about 15 mini cupcake sized clusters. Stores for about a week in air-tight container.
1/2/12
quick and easy chocolate-gingerbread
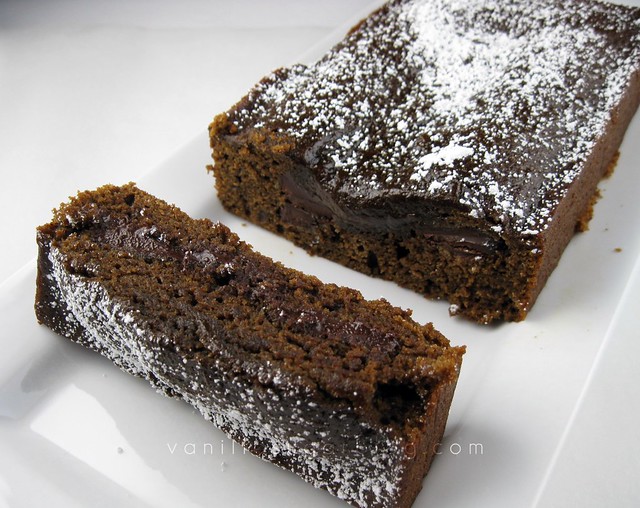
As in very quick and easy. As in the fastest quick bread I've ever made 'quick & easy'.
But saw these photos sitting in the archives and said "why not post it--someone out there will dig it".
Remember what I did with the gingerbread mix last year? The gingerbread cupcakes with white chocolate ganache frosting? Tres fab.
Did you also know that I made a batch of waffles with this box mix too? Pretty good. No photos on that one. If you do try it, use fresh whipped cream, not syrup--you already knew that didn't you?


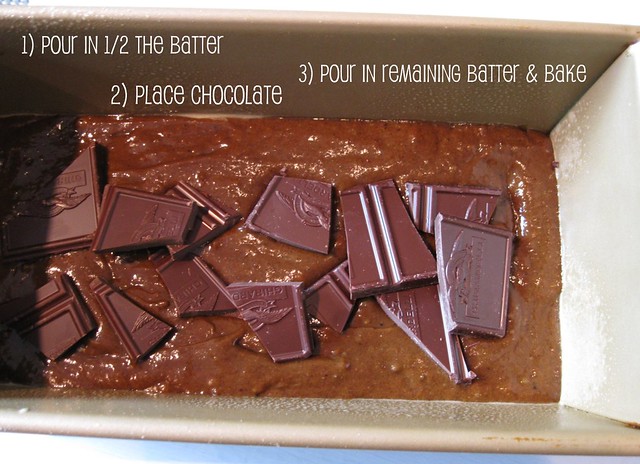
Easy peasy. Follow box directions, pour in 1/2 the batter into greased loaf pan, put down as much or as little chocolate as you like, then pour remaining batter on top and bake according to box directions.