I love lime and lemon custard tarts that have that right amount of 'twang'.
The kind of twang that hits your tongue on the first bite, then gets smoothed over with the creamy sugary custard. Such a clean, light taste.
A rich, deep tasting custard made with heavy cream, butter, egg yolks, and then a nice hefty dose of lemon juice & zest--to me, is possibly the best way to cleanse the palate after a meal.
The perfect lemon tart is light in taste but rich texture; one only needs a small slice to be satisfied.
Sure custard tarts are a bit of work, and by work I mean, pre-baking the crust (worth it) and zesting 4-5 lemons (even more worth it).
That's it really, not much else hard work to do when you look at it.
And what makes tart baking even easier is having a good, sturdy tart pan with removable bottom.
Make sure to invest in a removable bottom tart pan, they come in handy when you've done all that prep work and really want the last step of removing from pan to happen--effortlessly.


Tart pans can also be used to my infamous ginger crunch bars. Remember those?
I also made a lemon crunch version too!
This lemon custard tart recipe I got from the book: Say It With Cake by Edd Kimber.
Truly fabulous. This recipe calls for a hint of almond meal in the crust, no zest or lemon in the crust either, which is good; we don't need to overpower the whole tart with lemon, just the custard.
I can't recommend this cookbook enough.

I don't have any pie weights and I don't have a 9-inch tart pan, so this recipe was quite adaptable.
I used a square 8 or 9-inch tart pan with removable bottom.
You could try this in a pie plate, but make sure you grease it up well.

I would love to try this with key limes and meyer lemons.
But meyer lemons here on cape cod are hard to find, and if you find one prepare to shell out
$2.00 for one!



And then there was one....these bars will not last long.

similar recipes:
ginger crunch bars
lemon crunch bars
mini peach cheesecake tarts
Lemon Tart
From Say It With Cake
print recipe
crust
1 cup +2 TB flour
2/3 cup almond flour
¼ cup confectioner’s sugar
hefty pinch of salt
5 TB unsalted butter, diced & kept cold (I would use 6 TB)
1 egg yolk, cold
1 TB ice water
½ ts vanilla bean paste
filling
Finely grated zest of 4 lemons
2/3 cup super fine sugar (if you don’t have it, just use regular sugar)
½ cup real lemon juice (not bottled)
4 eggs
2/3 cup heavy cream
my cook notes:
I would use an extra tablespoon of butter for the crust dough, but that’s me.
I do not have pie weights and therefore skipped that step, and pre-baking the pie crust came out fine. Pay close attention to whisking the uncooked pastry cream; you don’t want to over-whisk and have too much air in the custard. These bars, as with any custard based tarts do not keep long--a day at most then the bottom gets soggy.
For the crust, place the flour, almond flour, confectioner’s sugar and salt into the bowl of a food processor and pulse to combine. Add the butter and pulse until the mixture resembles coarse breadcrumbs. Mix the egg yolk, water and vanilla bean paste together and add to the food processor. Pulse until the dough just starts to come together. Tip out onto a non-floured work surface and gently knead until the dough comes together into a uniform mass. Press into a flat disc, wrap in plastic wrap, and refrigerate for an hour.
Lightly grease a 9-inch fluted tart tin (preferably with a removable base) and preheat the oven to 400 degrees.
Roll out the pastry and place in the prepared tart tin. Refrigerate for 15 minutes until the pastry has firmed up again.
Line the tart shell with parchment and fill with a layer of baking beans or rice.
Bake for 20 minutes then remove the parchment and baking beans and bake for a further 5-10 minutes or until the pastry has started to turn golden. Allow the pastry case to cool whilst you make the filling. Reduce the oven temperature to 325 degrees.
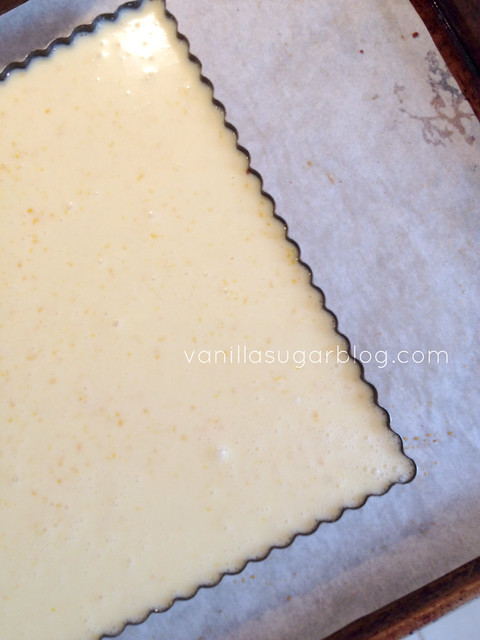
Place the zest, lemon juice, sugar and eggs into a medium bowl and gently whisk together until smooth. Pour in the cream and again gently whisk to combine. You don’t want to incorporate air so be careful to whisk nice and gently.
Pour the filling into the part baked tart shell and bake for 30 minutes or until the filling has just set. Allow tart to completely cool before serving. (I let it cool for 20 minutes, then 10 minutes in fridge).
Tip from Edd:
If you worry about a tart with a soggy bottom, allow the part baked tart shell to cool completely, then brush with an egg yolk and allow to set.
This creates a seal to prevent moisture from the filling making the pastry soggy.
4/27/14
lemon tart
12/23/13
chocolate-cherry tart bars (no mixer, one bowl easy)
It was interesting and comforting to receive emails from some of you telling me you loved the "no mixer" recipes I shared.
Definitely comforting as I always felt like the oddball for not having a mixer.
I want one, just don't have the money for one.
Other priorities pop up in life, and the luxury of buying a mixer gets thrown on the back burner yet again.
And you see that book ---> "Baking By Hand" yes that one, I can relate!
Every year I promise myself I'll get one, and I even post here that I will, but it never happens, so in the mean time I'm more than happy to keep creating "no mixer" and "one bowl" easy recipes.
I think you guys like it too.

These chocolate-cherry tart bars are pretty much like a cross between a shortbread and tart, definitely have the taste and feel of a rich chocolate shortbread.
I wanted to freshen them up a bit with some cherry jam and a hint of texture and crunch with toasted sliced almonds. You can get creative and use whatever jam you like.

So easy to put together.
As long as you don't mind using your clean hands to mix the dough.
I actually prefer using my hands to mix breads, shortbreads, pastry, and cookie doughs.
You get a better feel for the dough and you have a less chance of over-mixing/over-working the dough.
No one will ever know that you threw this together with no mixer, in one bowl and in minutes.
Shhhh.


Such a pretty tart isn't it?

For me, making it in a round form makes it more fancy schmancy.

chocolate-cherry tarts bars
recipe from vanillasugarblog.com
print recipe
dough:
19 TB unsalted butter, cold
1 cup granulated sugar
3 TB unsweetened cocoa powder (not dutch process)
2 ½ cups flour
1 ½ ts baking powder
1 ts sea salt
jam filling:
¼ cup +/- of cherry jam
Toasted, sliced almonds for decoration & crunch
Cook notes: I did not use a mixer for this as I don’t have one, but feel free to use one.
Just don’t over-work the dough. You can use any jam you like, I wanted to see if cherry would go well with this and it did. Don’t spread the jam to the edges, it will ooze out when baking and make it very hard to remove tart from pan.
I used a 9 inch cake pan, you can use an 8 inch or other tart pan if you have one.
If you're kitchen runs really hot or it's summer, after you've assembled raw tart, pop in fridge for a few minutes to firm up before baking.
Preheat the oven to 375ºF. Butter and/or non-stick spray up 8-inch cake pan.
In a large bowl cream the butter and sugar until light and fluffy.
Next add in the flour, cocoa powder, baking powder and salt right on top of the creamed butter. Using your hands mix until you have everything ‘just’ mixed. It might be a little dry, and that’s fine.
Take your greased cake pan, spread out 2/3 of the dough on the bottom of the pan, making sure to get all the sides well covered. Please make sure to push this down, so there are no cracks. If you do get a crack, just pinch the dough together.
Next spread down a layer of the cherry jam, not letting it get to the edges.
Take remaining 1/3 of dough and making giant crumbs (by squeezing clumps of dough) and place on top. No need to cover the top completely, we want to see the jam on top and the giant crumbs on top will make a nice crispy topping.
If you want to use almonds, sprinkle a handful or two on the top.
Bake the dough for 23-30 minutes, until the tops of the crumbs are lightly crisp; the dough will still be a bit soft, so let it sit for about 30-60 minutes to firm up.
Once it’s cooled and firm, carefully remove tart from pan using a frosting knife or thin spatula.
Use a sharp knife to slice into wedges.
11/25/13
cranberry toaster strudel (no mixer)
I recently asked a food poll-type question on my Facebook page about pop tarts.
What kind do you like and what are you looking for if you could make your own?
There was an overwhelming response for a "toaster strudel" type pop tart.
And of course you wanted easy--well, as easy as one could get with a pastry tart.
I made this toaster strudel fairly easy.
I don't have a mixer--so everything was done by hand, BUT done in as few steps as possible.
I also cheated a bit by using a cranberry butter for the filling (the Trader Joe's Cranberry-Apple butter is fabulous and it's ready to use; already has pectin in it, so no need to add cornstarch).
The hard part, if we have to have one is measuring out the dough into rectangles.
I highly suggest using a ruler next time to get straighter lines, if you want such a thing.
My lines were that straight, I was more "rustic".
The basic dough is a pate brisee dough from Joanne Chang of Flour Bakery here in Boston
and Flour the cookbook.
Very easy to dough to put together; came together very fast for me, and I did not use a mixer!
Everything was done by hand; used my hands to get the dough to the right consistency.
Actually I prefer using my hands when dealing with pastry doughs and breads, as we all know they can be tricky, and once you over-mix, the dough turns 'tough'.
But not all pastry doughs can be done by hand, a mixer is a must.

If you don't have a mixer and want to give this a go, then follow along with me, if you feel safer using a mixer then please do so. The original recipe with mixer instructions can be found here.


Add butter chunks to flour and use your hands to make crumbly.

This is what is looks like after you add in the egg mixture. Will be sticky.


Pretty easy right?
It's really not that hard.
To be honest I'm not that good at measuring out the rectangles, but I did rush it.
I highly suggest getting a baker's measuring board, like this one or something similar.
I have one on my wish list.....

I made my glaze very thick. I did not want a runny glaze, I wanted a thick frosting.

Sprinkles make it all better don't they?
I got these "all natural" sprinkles from Whole Foods; no dyes or chemicals.


Cranberry toaster strudel
Pate brisee dough recipe from joanne chang
print recipe
Pâte Brisée
8 pop-tarts or one 9-inch double-crust
dough:
1 3/4 cups (245 grams) unbleached all-purpose flour
1 TB sugar
1 ts sea salt
1 cup (2 sticks ) cold unsalted butter, cut into ½-inch cubes
2 egg yolks
3 TB cold whole milk
filling:
½ cup of cranberry butter (or any filling you wish)
egg wash for gluing edges AND glazing tops:
1 egg, mixed
glaze:
1 cup confectioners’ sugar
2 TB whole milk
Rainbow sprinkles for sprinkling
Cook notes:
You can use whatever filling you wish. If you use a jam, please mix a little bit of cornstarch with it to thicken it as it bakes (about ¾ ts cornstarch mixed with a little water and then add in ½ cup jam).
I do not have a mixer, and did this all by hand. Don’t run away! It was actually quite easy and you might prefer it because you will get a better feel for the dough, and will be less inclined to overmix it. The less you work the dough the more flaky the crust. Of course if you have a mixer and feel more comfortable, then please go ahead and use it.
I made my glaze very thick, as I did not want it to dribble down the edges. If you prefer a more runny glaze, then just add a bit more milk.
I used the cranberry butter from Trader Joe’s; you can use any type of cranberry butter you like though.
I was horrid at measuring out the squares for the dough; I did not follow my own instructions!
Bad baker. If you follow them you should get 7-8 rectangles; I only got 7.
And remember if dough gets too sticky while your measuring or filling it, just pop it back in the fridge.
In a large bowl, mix all the dry ingredients (flour, sugar, and salt) until combined.
In a cup, whisk the egg yolks and milk until blended; set aside.
Get a large sheet of plastic wrap ready, and set aside, near your workstation. This is what we will place the dough in once it’s mixed.
Place butter chunks in the flour mixture, and using your hands just crumble everything together until you have a crumbly dough, and dough holds together well when squeezed. And making sure there aren’t any giant clumps of butter left; small clumps are fine though!
Don’t worry if there is still flour in bottom of bowl—that’s fine!
Add in the egg mixture and mix again using your hands until you have a nice sticky mess.
At this point I’m supposed to dump dough onto a floured work surface and knead a little bit; I did not see the point in this as I wanted to work the dough as little as possible.
Dump the dough onto plastic wrap, flatten to about 1-inch thick in a circle or square, cover very well, and place in fridge for at least 4 hours or overnight. Do not let this sit in fridge more than 48 hours; it starts to turn a little sour and will harden.
When ready to bake, take dough out of fridge and let it sit about 15 minutes; if your kitchen runs hot or the season, then you might not need to let it sit.
Preheat oven to 350 degrees.
Line 2 baking sheets with parchment paper, set aside.
Divide dough in half. Press each half into a rectangle. On a lightly floured surface, roll out each half into a 14-by-11-inch rectangle. Using a paring knife, lightly score 1 rectangle into eight 3 1/2-by-5 1/2-inch rectangles (about the size of an index card).
Brush the edges of the rectangle with the beaten egg; this will be our glue to stick the rectangles together. Important step!
Spoon 1 to 1 ½ tablespoons of cranberry jam in a mound in the center of each scored rectangle; don’t let the jam go to the edges!
Place the second large dough rectangle directly on top of the first.
Using fingertips, carefully press down all around each jam mound, so the pastry sheets adhere to each other. I then used a fork to crimp the edges. You can also use a fluted roller if you have one.
Place the rectangles about an inch apart on a parchment lined baking sheet.
Bake for 40 to 45 minutes, or until the tops of the pastries are evenly golden brown. Let cool on the baking sheet on a wire rack for about 30 minutes.
For the glaze:
Whisk the confectioners’ sugar, and milk until you get the right consistency you want. I made mine very thick, like a paste. If you want thinner just add more milk or a hint of vanilla extract.
Sprinkle with sprinkles for a nice decorative touch. You might have to push the sprinkles down a lot to make them stay put in the frosting.
You should get 8 rectangles; I only got 7 but that’s because I didn’t measure them right.
8/21/13
white peach crumb tart

I hope you've taken advantage of the wonderful bounty of white peaches this summer.
If you haven't they are so good. To me, a white peach is far more "peachier" than a regular
orange/yellow peach.
They are so fragrant; a true smell of summer.
I love their smell so much that when I get a fresh batch of them, I place a few in a bowl, right next to my night stand so I can smell them while I sleep at night.
Try it, it's wonderful, the peach smell mixing with the summer winds blowing in through the window?
A summer memory you will never forget.


If you want a really flaky crust, work that dough as little as possible, just mix the dry ingredients
with the butter until just combined, wrap up in plastic wrap and let it rest at least five hours or
better yet overnight.
I like to roll it out while it's still in the plastic wrap until I have to unwrap it and finish up the edges.


Those edges are just like a crispy croissant. Heavenly!


If you don't have a 8 or 9 inch tart pan, I'm fairly certain this would make a perfect galette.
Just make sure your edges are nice and sealed, and you bake it on parchment paper on a
cookie sheet/pan.
Lastly, as soon as you get dough ready in pan, place in fridge again--always keep this dough cold!
Then I placed it back in fridge).
11/7/10
homemade pumpkin pop tarts w/ buttermilk glaze

"crack tarts" that's really what these should be called as they are hard to put down and walk away from. These were just lovely to make. They lasted a mere day in the house--record breaking. I will admit they were time consuming, but oh so worth the effort. In reality what perfect tasting pastry isn't very time consuming? The expressions on people's faces when they bit into them for the first time--oh how I wish I could just bottle that up. My favorite part? Those crispy, buttery, sugary edges! Whoa Nelly those are addicting. One could easily just make "edges", sell them and make millions. You know?

I have to say I am not good at measuring out the dough into rectangles. You need a ruler and stuff for that. Did I follow it? Of course not! I had to go my own dysfunctional way. But they still came out mighty fine. Other notes: of course I did some changes, you'll see them in colored parenthesis. The original recipe comes from King Arthur, I think. Always keep that dough nice and cold.


Pumpkin pie pop tarts with buttermilk glaze
Adapted from joy the baker & king arthur flour
print recipe
For the Crust:
2 cups all-purpose flour
1 tablespoon granulated sugar
1 teaspoon salt
1 cup (2 sticks) unsalted butter, cold, cut into cubes (I used a cheese grater)
1 large egg
2 tablespoons milk
1 large egg, beaten (for brushing the dough)
For the Filling:
3/4 cup pureed pumpkin
1 large egg (plus 1 large egg yolk)
(1 ts cornstarch)
1/8 ts ground cloves (I omitted)
1/4 ts ground ginger (I omitted)
1/2 ts cinnamon (I used 1 full teaspoon)
(Dash or 2 of pumpkin pie seasoning)
1/4 ts salt
1/3 cup granulated sugar
Buttermilk Glaze:
2 cups powdered sugar
1/8 (plus or minus depending on thick or thin you want glaze) cup buttermilk
Dash or 3 of cinnamon
Dash or 2 of sea salt
For the crust:
I like to use a cheese grater on my butter, keep it in the freezer until ready to use. In a small bowl, beat the egg and milk together. In a food processor, whisk together flour, sugar and salt. Add in the cold butter, pulse until you have nice crumbles. Pulse in the beaten egg with milk until just mixed—no overmixing! Lightly dust a clean counter with flour and knead the dough on the floured counter for a few turns until it really starts to come together. Divide the dough in two, wrap in plastic wrap and refrigerate for about 30 minutes.
While the dough is chilling, prepare the filling:
In a bowl mix all of the ingredients, well. Store in fridge till ready to use.
Assembly:
This next part is where you need to pay attention; I was horrible at this. Get your baking pans ready (2 – 3 pans) by lining with parchment paper, set aside. On a well floured work surface, press dough into a 3x5-inch rectangle, roll the dough out to about 1/8-inch thickness. The dough should be slightly larger than 9x12-inches. Trim dough with a pizza cutter, creating a rectangle that is 9-inches tall and 12-inches long. Using the pizza cutter, cut each side into thirds, creating 9 squares. Place dough squares in the fridge while you roll out the second piece of dough in the same way.
Brush one set of 9 squares with beaten egg. This will act as the glue for the top layer of dough. Spoon about one tablespoon of pie filling into the center of each brushed dough square. Top with a piece of dough and use a floured fork to crimp the sides closed. Use the tines of the fork to create vent holes in each tart. Recipe from dawn finicane of vanillakitchen.blogspot.com Place the pan in the fridge to let it get firm again; you don’t want to bake these with warm dough, they won’t crisp up. Keep in fridge at least 30 minutes. When ready to bake preheat oven to 350 degrees. Bake for about 20 – 25 minutes or until the tops and edges are nice and golden brown. Cool tarts on wire racks. You can let them cool before glazing or not, I didn’t wait. But if you glaze them straight away, you do need to let the glaze harden before serving.
For the buttermilk glaze:
Make sure to sift the powdered sugar, you don’t want any lumps in the glaze. Mix all the glaze ingredients really well and apply with a spoon over the racks. Let glaze dry on the tarts before devouring.
2/14/10
chocolate mousse on puff pastry w/ raspberries

Are you guilty, like me, of eating puff pastry plain? Taking strips of puff pastry rolling them in sugar and cinnamon or making them savory by sprinkling them with cheese baking till a perfect crisp and then devouring? I have all intentions of making something grand with my puff pastry (and it's not cheap to buy either), but then there are some days where I just want to make it simply for the sake of eating it for that "buttery crunch".

This time I made something fun out of the puff pastry.
Taking a perfect chocolate mousse, adding it to a baked crispy puff pastry, then drizzling it with some chocolate ganache and fresh raspberries.
Heavenly. Puff pastry and chocolate will always be a match made in heaven.
This is fairly easy to make too, the only downside is that it does not keep. Pretty much has to be eaten right away--no problem right? We all know puff pastry does not keep it's crunch after about four or so hours, maybe longer. But can I just say the crispy puff pastry teamed up with the chocolate mousse, the fresh raspberries and a int of chocolate ganache is just heavenly. I mean I know I always say this, but really all those flavors in one bite...oh baby! So good. See the photo below, two bites.
And should you not want to make chocolate mousse from scratch?
Use pudding! So easy.


chocolate mousse on puff pastry w/ ganache & raspberries
print recipe
Chocolate mousse (from epicurious.com):
2 cups chilled heavy cream
4 large egg yolks
3 tablespoons sugar
1 teaspoon vanilla
7 oz fine-quality bittersweet chocolate (not unsweetened), chopped
Cook Notes:
you might want to do the ganache first as it needs a bit of time to cool.
Don't have time to make the mousse? Use instant pudding in a pinch.
for the custard: Heat 3/4 cup cream in a 1-quart heavy saucepan until hot. Whisk together yolks, sugar, and a pinch of salt in a metal bowl until combined well, then add hot cream in a slow stream, whisking until combined. Transfer mixture to saucepan and cook over moderately low heat, stirring constantly, until it registers 160°F on thermometer. Pour custard through a fine-mesh sieve into a bowl and stir in vanilla.
Melt chocolate in a double boiler or a metal bowl set over a pan of simmering water (or in a glass bowl in a microwave at 50 percent power 3 to 5 minutes), stirring frequently.
Whisk custard into chocolate until smooth, then cool.
Beat remaining 1 1/4 cups cream in a bowl with an electric mixer until it just holds stiff peaks.
Whisk one fourth of cream into chocolate custard to lighten, then fold in remaining cream gently but thoroughly.
I then chilled my mousse in a glass bowl, covering the mousse with plastic wrap until ready to use.
puff pastry: Unroll the puff pastry and shape into whatever size you like. I did a long rectangle.
Bake according to package directions. Let cool a bit, and then fill with ready chocolate mousse.
chocolate ganache strips:
If you want to decorate the pastry with chocolate ganache strips then:
6 ounces 70% cacao bittersweet chocolate, coarsely chopped
¼ cup heavy cream
2 TB unsalted butter, room temp
Melt the chopped chocolate with the heavy cream in a double-boiler. Make sure to stir occasionally until fully melted. Once melted, take off the heat and add in the butter bits. Make sure to whisk this up good. The better you whisk the glossier and smoother the ganache. I waited about an hour and a half for it to cool then poured it into a plastic bag to pipe onto chocolate pastry.
Just before the Ganache strips set up, decorate with raspberries.
Let set up about 15 minutes and sprinkle with confectioner’s sugar, optional.
12/9/09
chocolate-caramel tarts

Lately I've been giving you a lot of baked sweet nothings. That term sweet nothings can be taken so many ways can't it? I find it ironic that I am giving you food ideas on what to make to give as gifts for the holidays when I haven't even started. Yes, I haven't even started. Tell me I'm not alone (lie)? The only thing I can say that is halfway done are the Christmas cards-- half people, half. I still haven't a clue on what to make for holiday gifts for my friends and clients. Wouldn't it be awful if I gave them gifts and no food? Oh the horror! I think I would get a lot of sad, almost on the edge of tears, phone calls. Ha ha, I would never do that. I love to make foodie-gifts just simply for the mere pleasure of their facial expressions of pure happiness. That makes all the slaving in the kitchen soooo worth it you know?
Last year I made a version of poor man's toffee that was a huge hit. People are asking for it again, but I hate giving the same thing. I might just give these chocolate-caramel tarts. They are very easy, and I used a shortcut too. I bought the pre-made shell tarts from Whole Foods. I just didn't have the time to make the tarts by hand. I know, bad, but I am so strapped for time these days. If you don't want to buy the tarts you could easily make a cookie-crust that would be perfect--like crushed Oreo's?
So what foodie gifts are you giving this holiday season?

chocolate-caramel tarts
Take some pre-made mini chocolate or vanilla tarts, chill a bit in fridge. Take some melted caramel and fill tarts halfway, add in a roasted macadamia nut or two, chill in fridge until caramel is set. Then pour melted dark or milk chocolate to the top, let set. You could literally add in whatever you like: peanut butter, white chocolate, peanuts, almonds...endless possibilities.
print recipe
8/23/09
tomato & spicy corn relish on puff pastry with horsey sauce

An easy post today as I had my butt kicked at the gym today, so I am exhausted, but it's a good kind of exhausted; a kind of exhausted that will make you sleep like a baby. I had a workout session that was easy in the beginning, harder in the middle because I wanted to give up and say that's enough for now, but no I pushed harder and made it to the end thus feeling like a million bucks. Don't you love that after workout feeling? Good stuff. But most times when I workout like crazy I get like 'prison hungry' afterwards. Ever get that? I try not to overeat and look like a pig eating four meals at once because I get the strangest looks from friends and family. Speaking of the gym, you know what's the worst? Those meatheads who make all those grunting noises. What's up with that? Why all the noises? I know it's hard lifting weights, but why all the excessive grunting and then "slam!" of the weights after each set? And a constant stare at me in between sets? Are you trying to get me to notice you? You're scaring me away...

Tomato, cheddar & spicy corn relish on puff pastry
print recipe
2 large tomatoes, thinly sliced, left to dry out a bit on paper towels
1/4 to 1/2 cup of spicy corn relish (see below)
1/2 cup shredded cheese (your choice)
Puff pastry
Horsey sauce (see below)
I don't know about you but I do love working with puff pastry. Some times when I'm not in the mood to make my own puff pastry I use my go-to pre-made puff pastry Dufour's. Which I find at Whole Foods in the frozen section. Always keep your puff pastry frozen till ready to use, then defrost according to directions on package. Puff pastry does not keep in the fridge long after it's been thawed. Here's is the recipe I use for spicy corn relish. Or I use this pre-made relish, which is just as good, it's from Stonewall Kitchen who make wonderful products.
So all I did was slice the tomatoes thin and let them drain a bit on paper towels. Rolled out the puff pastry onto a greased cookie sheet, layer the puff pastry with a thin layer of cheese of your choice (I used cheddar) then a thin layer of the spicy corn relish, then the tomatoes.
Sprinkle with a bit of salt & pepper and bake in preheated oven (375 degrees) for about 15-20 minutes, making sure to turn pan at midpoint. Let cool and slice. You can top with the horsey sauce. Puff pastry, once cooked, does not keep well after a day, really should be eaten straight away--which is no problem in my house.
Horsey Sauce
1 cup sour cream
1/4 cup heavy cream
1/4 cup horseradish
1 ts of white wine or vinegar
In a small bowl stir together the sour cream, heavy cream, wine, and horseradish.
Makes about 1 ½ cups sauce; you can halve this or even quarter this recipe.