(contest closed)
Today I’m beyond excited to have Heather Baird of the award-winning blog sprinklebakes.com as our guest interview.
Heather has her first cookbook out “Sprinkle Bakes”. A delightful book about unleashing your inner creative self with her easy, foolproof recipes, baker and artist Heather offers us a fresh and innovative approach to creating anything from cookies, cakes, spoon desserts, pastries and candy to look and tastes like works of art.
She also teaches us the finer points to making the perfect icings, best tips for perfect piping, ways to make culinary paints, crushed pigments—even informs us on brushes and how to create a template for piping, gum paste or fondant. Literally every area of fine cake decorating is covered and with ease or as I like to call it “no fear”. Heather truly shows us how easy it really is to take an image we see in a book, magazine or the Internet and transform it unto a cake or cookie.
Her cookbook Sprinkle Bakes is perfectly laid out with:
baking equipment, art supplies & decorating tools.
cookies, cakes, candies, spoon desserts, icings, pastries & crusts.
culinary paints, crushed pigments, gel food coloring paints, brushes, creating a template.
sculpture: carving, hand-modeling, armature, building,, manipulating, subtracting, assembling, impasto, casting.
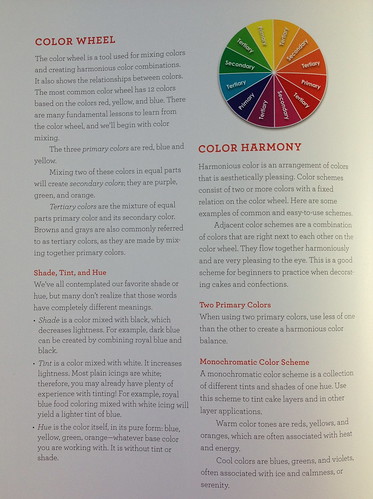
color: color wheel, color harmony, natural hues, color icings & batters.
templates, baking websites, useful suppliers, index.
Biography: She is an accomplished painter and photographer whose works are in public and private collections across the United States, but her passion is creating eye-popping, mouthwatering desserts. She is a devoted practitioner of international confectionery technique who explores the outer limits of patisserie. She writes about her adventures in the world of creative dessert-making in her award-winning blog at sprinklebakes.com. Heather lives in Knoxville, TN, with her husband Mark and a mischievous pug named Biscuit.
Heather has also, generously shared with us a special recipe that just for the vanilla sugar blog readers. (see recipe after the interview).
Thank you so much Heather!
Questions:
Heather, first off, congratulations on the book! When my copy arrived in the mail I literally sat at my desk for a straight hour, mouth open, heart racing, feet tapping at all the culinary creations. I was shocked, as I read through how easy these are to make. I mean you really show us how easy it is to create fancy/edible works of art.
Always had it in my mind that the actual creations you make need a ton of specials tools, or fancy pastry schooling—but no, most of them are just so easy. Case in point, the “Impasto” you used on a cake (see photo below) to make flames is nothing more than candy melts painted (thinly) on parchment paper.
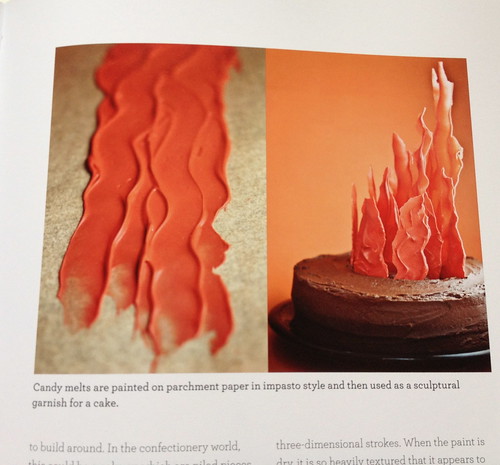
Impasto: is a form of painting that crosses over into sculpture. It refers to a technique in which a heavy bodied paint is laid on a surface very thickly. A palette knife is used to create three-dimensional strokes.
You don’t necessarily need any pastry skills – or art skills - to make the creations in this book. At my last book signing someone said “I could never make that!”(pointing to the impasto cake), but the technique is really easy and we’ve worked very hard to describe the steps for each recipe in great detail.
extremely helpful hints throughout the book on colors for doughs, frostings, icings, candies.....
I know you were, and still are a painter. What medium?
I work in oils and acrylics. I love painting but it’s been difficult to find the time when elbow-deep in frosting.
Were you behind the scenes of a gallery? Or an at-home designer for various clients?
I’ve been involved in nearly every aspect of gallery work, but I was behind the scenes for many years. In 2004 I was trained as an archival picture framer, which taught me patience and discipline when handling valuable art.
I actually think that experience has helped me with my cake decorating!
My favorite job was being a fine artist.
With painting, you get to be part of something long-lasting, something that has the potential to survive for ages.
Of course, the same cannot be said for dessert.
But sometimes the art is in the creating, and not the finished product.
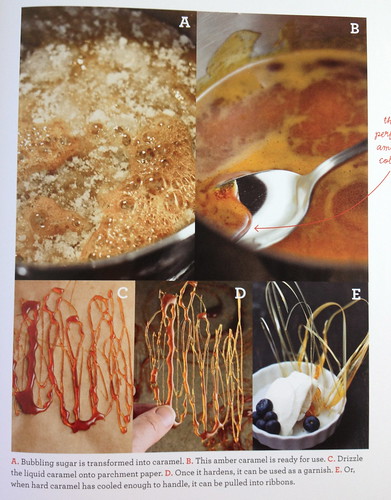
Hard caramel, step by step instructions, pg. 54
What kind of works of art did you create? Mixed media?
Were you classically trained in the culinary world?
As a young artist I was drawn to abstract cubism (think Picasso) and that’s what I practiced and had success selling, but through the years my artwork has become more figurative.
I have never taken a cooking or pastry class – not even a cake decorating class!
I read and research if there’s a baking or decorating technique I want to learn. I learn best from trial and error.
Were you ever intimidated by sugar crafting? I know I am, a lot actually.
Yes! There are still projects that I haven’t tried because they are so intricate.
The process can’t be rushed. You have to be good to yourself and allow plenty of time to create and get in “the zone”.
That’s half the work. The finished product is so worth it, though.
Afterward I find that I just want to keep going, trying new crafts and bettering myself through this medium.
What made you switch over to food? What drove you or inspired to give it a go?
There are events in life that are really hard on a person’s creativity – like moving house.
My canvas and brushes were in moving boxes and I decided to explore baking because, well – my muffin tins and cookie cutters were the only things accessible at the time!
(I got a couple questions from fans on this one)
How were you approached to do a cookbook?
A literary agent had browsed my blog after finding the Mehndi hand cookies I created.
She read my bio and saw that I was an artist and felt the art angle could work for a baking book.
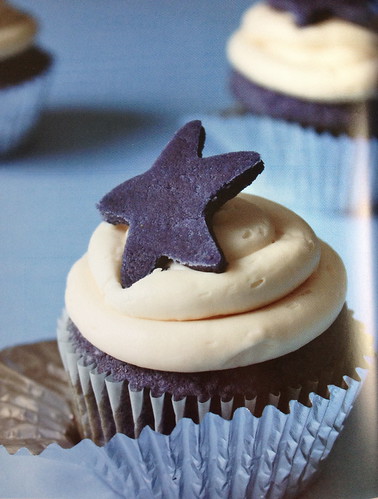
blue velvet cupcakes (look at that color!) pg. 195
Are there any recipes that you had a really hard time with?
I didn’t have many problems with the recipes, most of the time it was photography with which I struggled. I was shooting during the winter months and was desperate for some natural light. My dining room had to become a full-blown photography studio.
Any that didn’t make the book?
Yes, a few. A pumpkin-spice cake covered with autumnal-hued leaf tuiles was one of my favorites that didn’t make it. It was very pretty, but I decided against submitting it when informed that the book was brimming at 386 pages.
Originally, this book was expected to be around 170 pages. It was finally edited down to 277 pages.
The recipe I’m sharing today is from a sketch in my recipe journal (see below for recipe).
I had planned to make it for the book, but I had one too many ideas for hard caramel. It’s great to finally see this cake come to life – and it’s so delicious! Who doesn’t love Hummingbird Cake?!
What is your favorite creation in the book? The one that gave you the most satisfaction?
I really love the yule log cake. It was so fun to make because it looks just like a plank of wood. It’s made of orange genoise and chocolate ganache, so it’s really delicious too.
How did you come up with all your creations (for the book and the blog)?
Do you get a creative idea in your head, write it down? Or see a recipe elsewhere and think of ways to “kick it up a notch?”
All of those things.
But I am constantly sketching ideas in my recipe journal.
I usually have a picture of what I want to make in my head and then think to myself “how do I get there from here?”
One of Heather’s most recent creations (on her blog) the cappuccino mousse with coffee caviar: dessert caviar without the molecular gastronomy! Here is a video of that creation.
Coffee Caviar from Heather Baird on Vimeo.
What made you think of this?
It’s really neat to see all the things molecular gastronomists come up with, but most of the techniques are not accessible to the home baker. As the latter, I just wanted to have some fun, too!
Who were your taste-testers?
My friends and family were well fed throughout the writing of this book.
I love how enthusiastic they were, even at the end when everyone’s eyeballs were floating in cake they never turned down a bite.
What do you like to do in your leisure time?
Coffee, books, music. I also love to watch Star Trek re-runs.
In a typical day, what do you eat? I know sugar is a staple in your diet for recipe taste-testing.
I’m a minimalist when it comes to solid food.
I like simple; multigrain toast with real butter almost every morning for breakfast and I eat salmon and tuna nigiri about twice a week.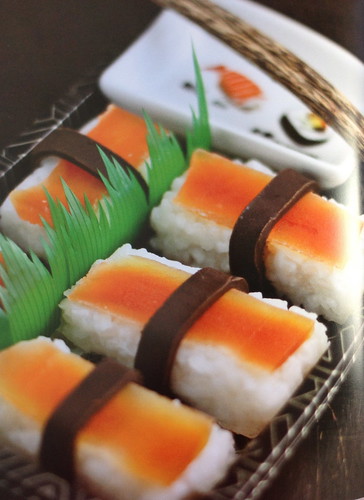
sweet coconut sushi w/ chocolate "soy" sauce. pg. 159
Any foods that you don’t care for?
Well, this isn’t exactly food per se, but I don’t like mint chewing gum.
When I was a child my mom would give me a piece when I got squirmy in church.
Chewing a piece takes me right back to that restless feeling.
Favorite pig out foods?
Onion rings and a grilled cheese with pickles.
Cherry limeade to go with that.
Chocolate-chunk cookie dough ice cream.
Did you grow up in a “foodie family”?
I have a family of great cooks – great southern cooks.
Growing up there was never pink Himalayan sea-salt on our dinner table. Nothing fancy.
One of my favorite family meals is “soup” beans (pintos) with cornbread and slices of home-grown tomato on the side.
The food was, and still is, simply but expertly prepared.
The fanciest dessert my grandmother ever made was apple stack cake.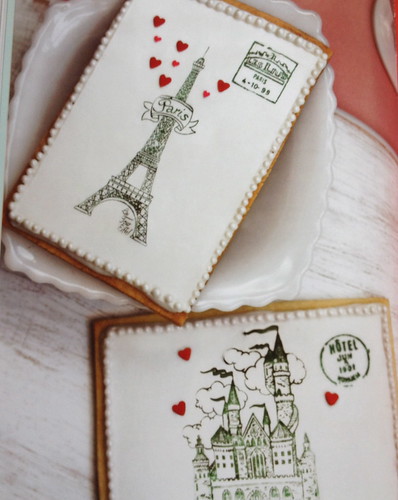
postcard cookies. pg. 109
Is your husband a foodie?
He is!
He’s given me some great insight on some of the recipes I develop, and he never spares my feelings.
I think that’s great but I don’t always take his advice.
In the culinary world, who are your favorite chefs/bakers?
Stella Parks of Table 310 in Lexington KY, and author of the blog BraveTart.
I just love her spin on nostalgic treats. I must give some love to my favorite local bakery, too.
Magpie’s in Knoxville TN. has the best Strawberry cake I’ve ever tasted.
Favorite places to travel just for the food?
When I was in New York, my agent took me to The Breslin for breakfast.
They have an amazing fried peanut butter-banana bourbon sandwich.
I would travel long distances for that sandwich.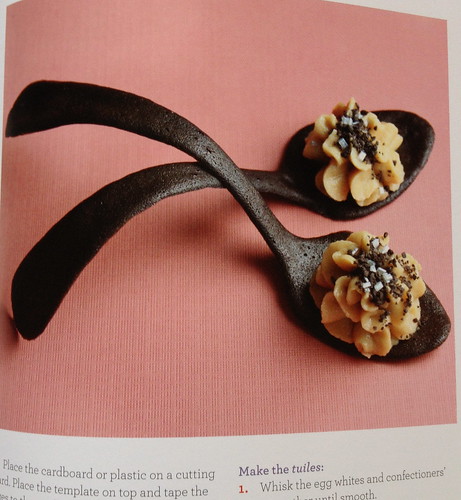
tuile cookie spoons w/ peanut butter mousse. pg. 162
A second cookbook in the works? If so, what will it be about?
My editor encouraged me to think about a second cookbook.
We’ll see what happens.
I’d definitely love the opportunity to create another book.
Any advice to your fans who wish to achieve your level of culinary creations?
Grow some patience, and don’t get too discouraged if a recipe doesn’t turn out as planned.
I’ve had plenty of failures and that’s a valuable lesson in what not to do.
Also, any sensible advice to people who wish to get published?
I didn’t actively seek out an agent, so I’m afraid I don’t have a great answer to this question.
I can only say that if you do your best and if your passion shines through your writing, then others will take notice!
One of the recipes that didn't make the book: Hummingbird Cake. Thanks again Heather for sharing this.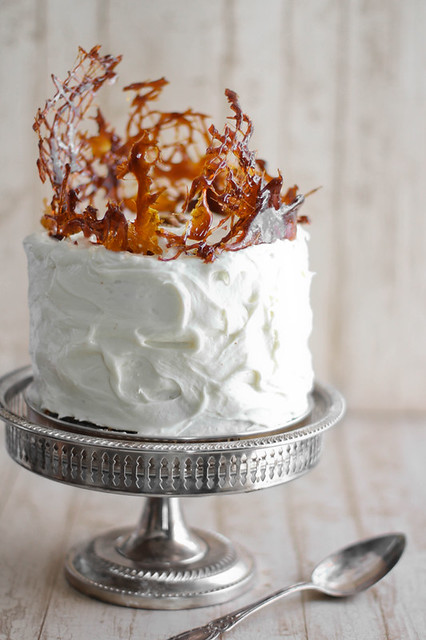
Hummingbird in a Cage
by heather baird of sprinklebakes. com
print recipe
This recipe was once destined for the pages of my baking book, but because of limited space it was only realized as a sketch – until now!
I hope you’ll enjoy my take on this popular southern dessert called Hummingbird Cake. The “cage” is made of deep amber hard caramel pieces that are pressed into the top of the cake. A single walnut halve is placed in the top center of the cake inside the “cage” to represent a hummingbird.
Cake:
3 cups cake flour (sifted all-purpose may be used)
2 cups sugar
1 teaspoon baking soda
1 teaspoon cinnamon
1/2 teaspoon salt
3 large slightly over-ripe bananas, chopped
1 cup drained crushed pineapple
1 cup canola oil
2 large eggs
2 teaspoons vanilla extract
1 cup (4 ounces) finely chopped walnuts
Preheat oven to 350°. Lightly grease and flour three 6-inch (pictured) or two 9-inch round cake pans.
Sift the flour, sugar, baking soda, cinnamon and salt into a bowl. In another bowl, stir or whisk (by hand, not with an electric mixer!) the bananas, pineapple, oil, eggs and vanilla until combined. Pour into the dry mixture and fold together with a rubber spatula just until well combined. Do not over mix. Fold in the walnuts. Spread evenly into the pans.
Bake until the cake springs back when pressed in the center, 30 to 40 minutes. Let cakes cool in the pans for 10 minutes, and then turn out onto a piece of parchment or wax paper. Invert them onto a cooling rack so the cakes are right-side up. Cool completely.
The cake can be prepared up to 1 day ahead and stored, uncovered in the refrigerator. Let stand at room temperature 1 hour before serving.
Frosting:
1 cup white chocolate morsels
1 8 oz. package cream cheese, softened
1/2 cup butter, softened
3 cups powdered sugar
Place white chocolate morsels in a microwave-safe bowl. Heat at 30 second intervals in the microwave until melted and smooth. Set aside.
Combine cream cheese and butter in a large mixing bowl; beat at high speed with an electric mixer until creamy. Add melted chocolate; beat well. Gradually add in powdered sugar, beating at low speed at first, then increasing to medium speed until mixture reaches desired spreading consistency. Frost cooled cake layers.
Caramel cage pieces:
1 cup (225 g.) sugar
½ teaspoon lemon juice
1 walnut halve(for garnish)
Fold a large piece of baking parchment over the bottom dome of an 8 or 9-inch heat-proof bowl. Place the bowl dome-side-up on another piece of parchment.
Combine sugar and lemon juice in a saucepan with a metal kitchen spoon stirring until the sugar resembles wet sand. Place on medium heat; heat without stirring until sugar starts to melt around the sides of the pan and the center begins to smoke. Begin to stir sugar. Continue heating, stirring occasionally until the sugar is a clear, deep amber color. Remove from heat immediately; place bottom of pan in ice water to stop the cooking.
Drizzle caramel from the tip of a metal spoon onto and over the entire surface of the parchment dome. Repeat until all the caramel is used. Let caramel harden, then break caramel pieces off the parchment paper in tall shards. Press hard caramel pieces into the top of the cake, so that the curved pieces are pointing inward to create a “cage”. Place a single walnut halve in the center of the cake to represent the “hummingbird”.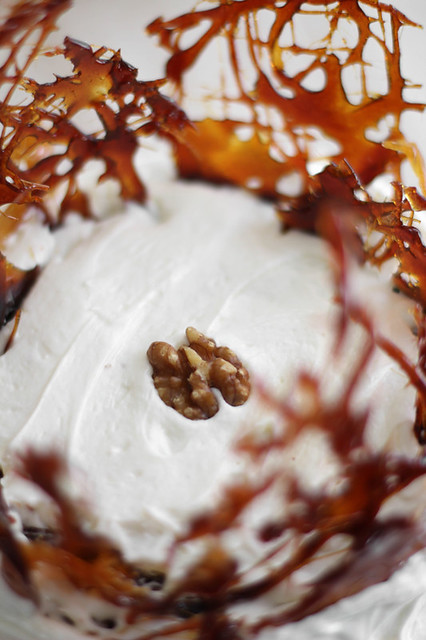
Giveaway!
Heather is donating two of her books for a giveaway.
All you have to do to enter is leave ONE comment telling us what is your favorite recipe over at sprinklebakes.com.
Anything there you might be inspired to create yourself?
Please leave one comment, have a valid email address in post or in the comment.
We'll do the drawing on September 18, 2012
9/10/12
Interview: Heather Baird of Sprinkle Bakes +Giveaway!
8/29/12
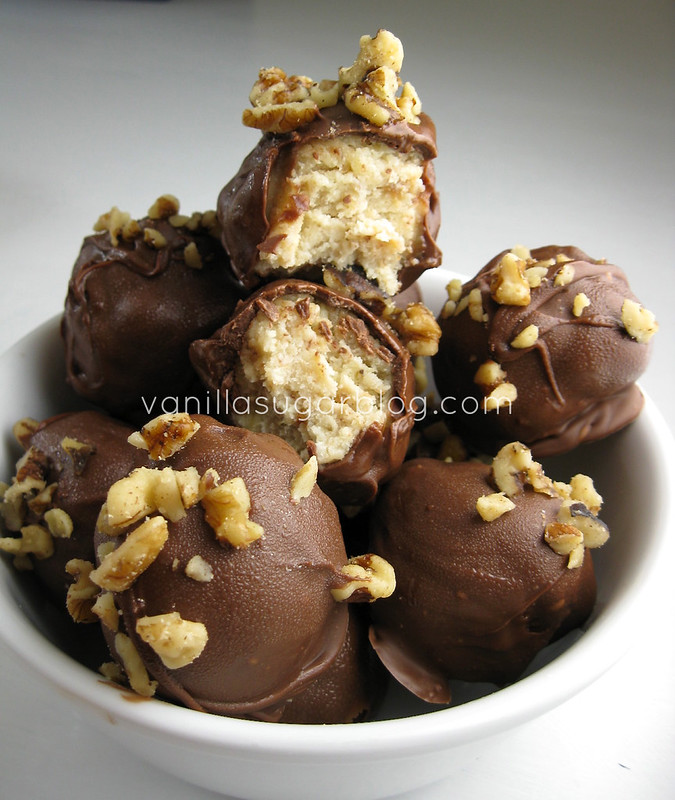
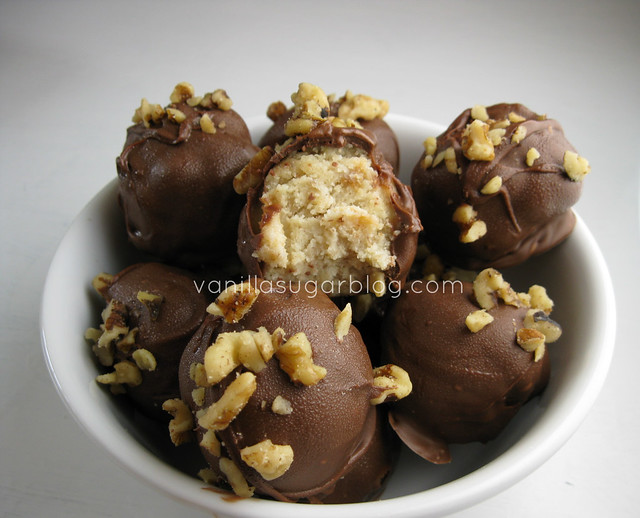
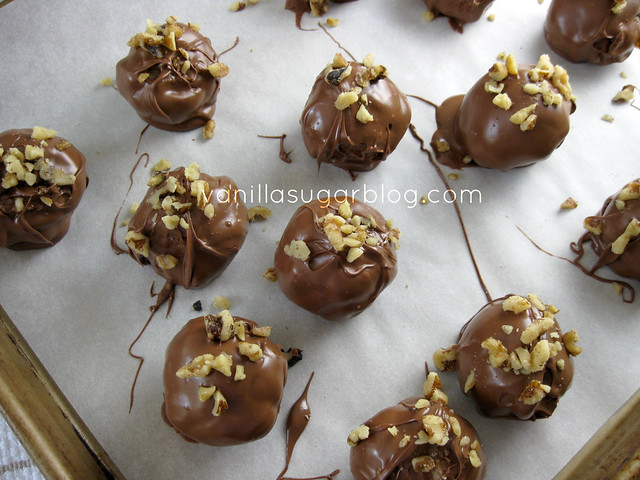
banana bread balls
Cake balls.
I like them, they're ok. I prefer cake balls made with real chocolate not dipping melts.
Something about that flavor of dipping melts is just not right--chemically? metallic?
The one thing that I hated about making cake balls is the batter is a little too delicate, sure I'm not a professional and really haven't made them a lot, so I could get better with practice.
With these banana bread balls, the dough/batter is so much easier to dip. Heartier, less chances of it falling apart when you dip them in chocolate.
Who doesn't love easier?
(sorry for the moisture droplets on the chocolate; it's been a hot & humid summer on cape cod)
So yes, these banana bread balls were a HUGE success; I was truly happy with the first run.
I'm certain you will be too.
Great idea to make with the kids. Just have your dipping station set up and it's so easy.
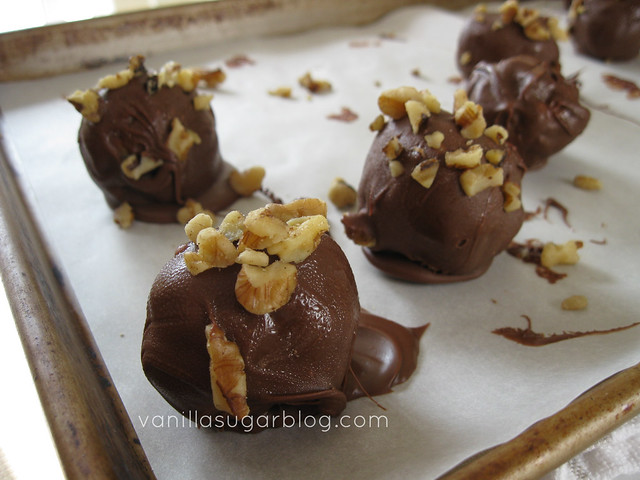
I highly recommend using the nuts--you really want that texture. You could also stick them on a stick.
So easy to make really. If you want to find a 'hard part'? It would dipping the balls in chocolate.
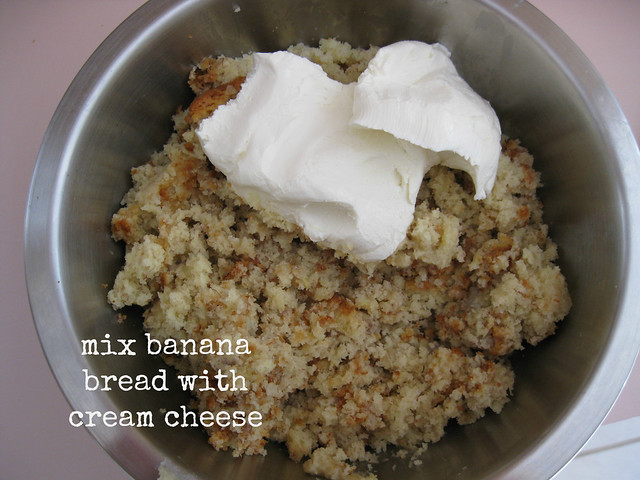
Take a perfectly cooked loaf of banana bread, smash it up and mix with cream cheese.
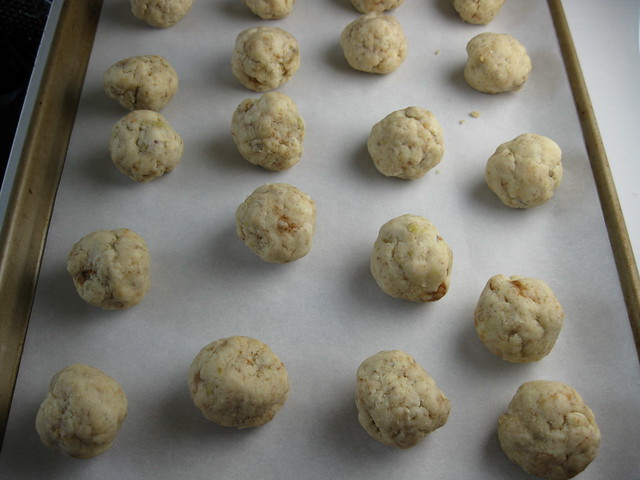
Roll into 1-2 inch size balls. And keep in fridge till ready to dip. Make sure the balls are always kept cold before dipping.
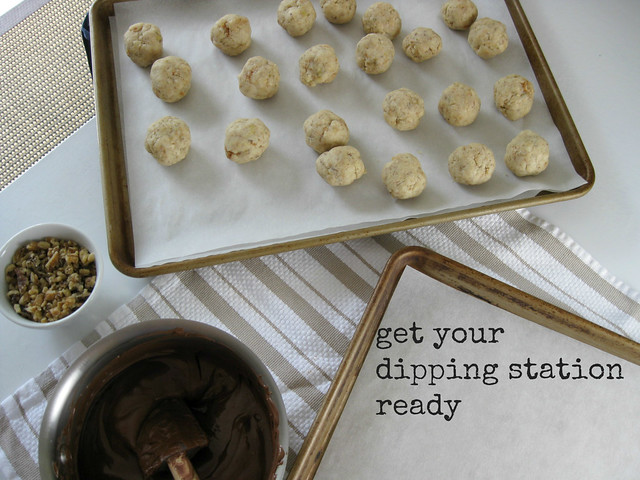
Get your dipping station ready.
For dipping, I used a plastic fork. Chopsticks also work well too.
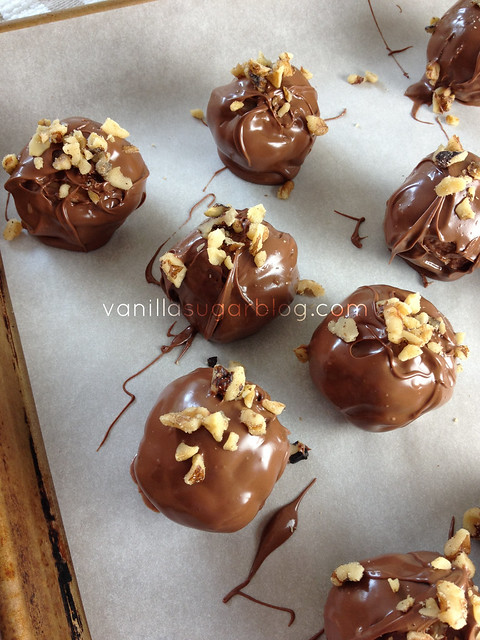
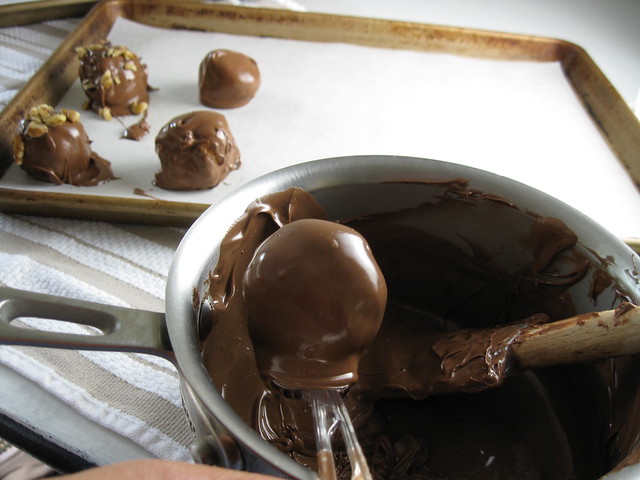
Make sure to sprinkle tops with chopped walnuts!

Let set up until chocolate hardens.
I used milk chocolate for dipping. But dark might work too.
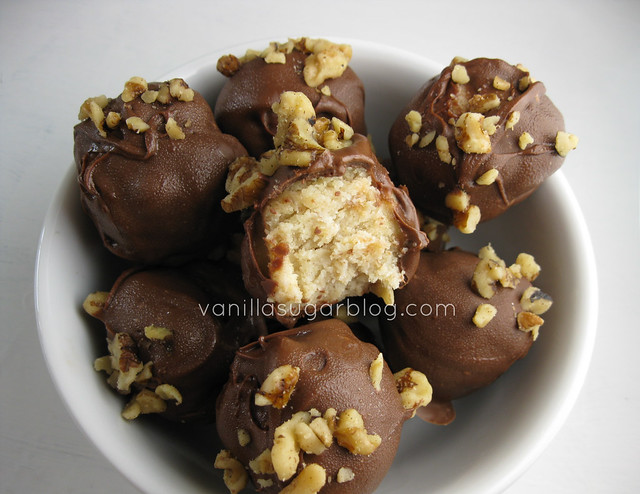
I think these lasted a day in the house? They are really good. A real treat.
I'll be taking a small blogging break for a few days.
Have a wonderful Labor Day weekend.
banana bread balls
print recipe
I used one of my favorite banana breads: Mama Dips’ Banana Bread.
Feel free to use whatever banan bread recipe you prefer.
1/2 cup shortening
1 cup sugar
2 eggs
1 cup mashed bananas (about 3 medium; the browner, the better!)
3 TB sour cream
1 TB lemon juice
2 cups flour
1 1/2 ts baking powder
1/2 ts salt
1/2 ts baking soda
8 ounces of cream cheese, room temp
2 cups +/- of milk chocolate chips (for dipping)
1 cup of crushed walnuts or pecans, optional
Preheat oven to 350 degrees
In bowl of stand mixer, cream shortening and sugar.
Beat in eggs one at a time; then bananas, sour cream, and lemon juice.
Sift together flour, baking powder, salt, and baking soda.
Slowly add dry ingredients to mixture.
Pour into greased and floured 9x5x3 loaf pan.
Bake for 60 minutes.
Once bread is cooled. Crumble it up in a large bowl until you have crumbs—no large chunks should be remaining.
Add in the softened cream cheese. Mix well. I used my hands to mix this really well. Cover bowl with plastic wrap and let set up, harden.
Line a cookie sheet with parchment paper.
Scoop out 1 or 2 inch balls, roll into fairly uniform balls. If using a medium size ice cream scoop makes it easier then go ahead. Remember you don’t want balls any larger than 2 inches.
Once all balls are done, place in fridge to chill.
Temper milk or dark chocolate. I used about 2+ cups of milk chocolate chips.
You might need a bit more.
Once chocolate is tempered, using a plastic fork or chopsticks, dip balls into chocolate and place on parchment lined cookie sheet.
Sprinkle the balls with the chopped nuts while chocolate is still soft.
It takes a while for the chocolate to harden or you can place them in the fridge to speed up the process.
They keep covered in air tight container in the fridge for about 3 days.
Should make about 25 balls; dependent on the size you roll them.
8/26/12
bacon jam stuffed corncakes
Bacon Jam.
Aren't those two of the best words--ever?
I've had bacon jam on my "baking bucket list" for a long time.
I finally got around to making it. Was inspired from one of my favorite foodie blogs Homesick Texan.
She made a spicy version and I made a spicy & sweet version.
But I learned the basic (and good) bacon jam base from her.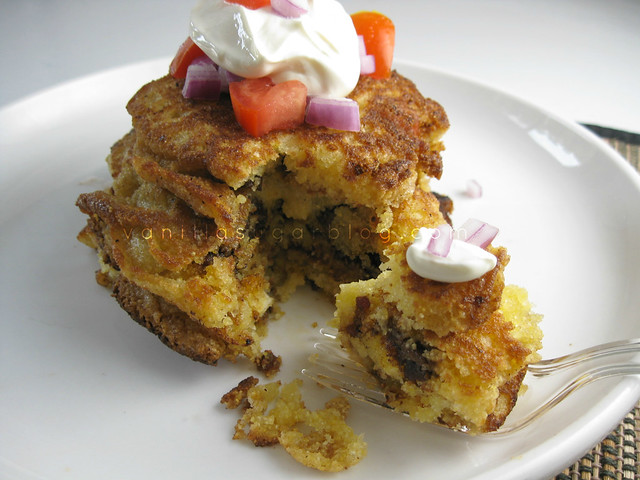
You should know the other fabulous find of this post.....
I wanted to make corncakes from scratch, but alas I had no cornmeal in the house.
But I did have a box of cornbread mix from Trader Joe's.
I do hate to waste food, so why not see if it will pancake?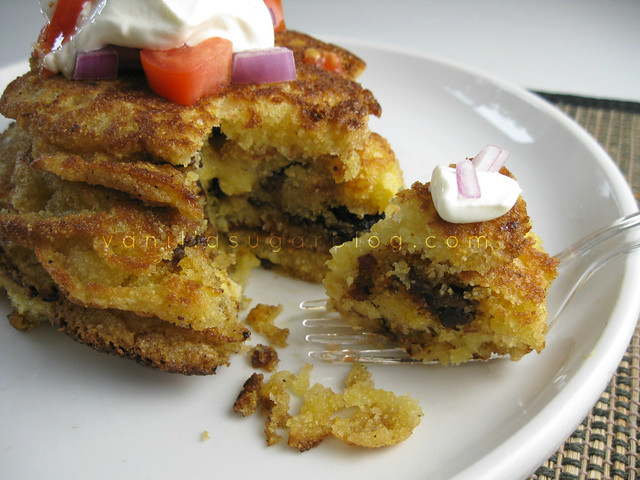
Guess what? It did! And it was quite good to.
Now before you all start hating on me for using a box mix, it was all I had AND
these actually fried up a lot lighter and crisper than a normal corn cake would.
Plus I had to see if "it would pancake"? Just like the term "will it waffle"?
The only downside? A bit tricky to flip.
But one can remedy that with making the corn cakes small; pouring a little batter at a time.
I bet you have a couple boxes of cornbread mix just sitting in your cupboard right now.
Ask yourself--will it pancake? I bet it will.
Go ahead and mix up the batter like you normally would.
Fry them in some melted butter.
Stuff with bacon jam!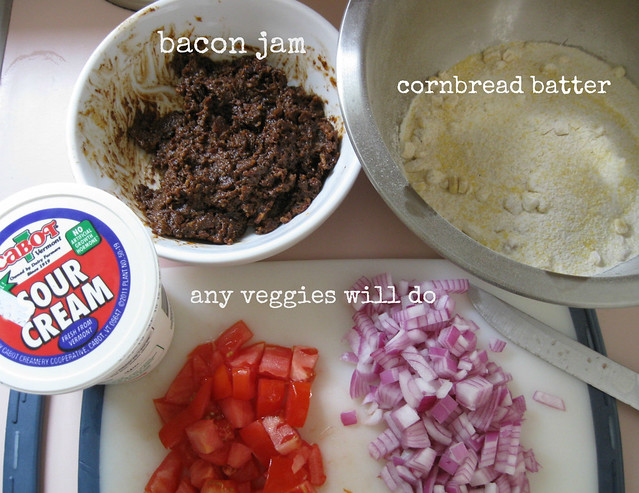

Making the bacon jam is quite easy. I've included the recipe in this post as well.
If y ou do make it, and decide to freeze some, let me know if it freezes well.
I know a lot of you will ask me that question, and to be honest the jam did not last long enough to "save for later".
It got used up fairly fast in a bunch of other recipes, which I will post.
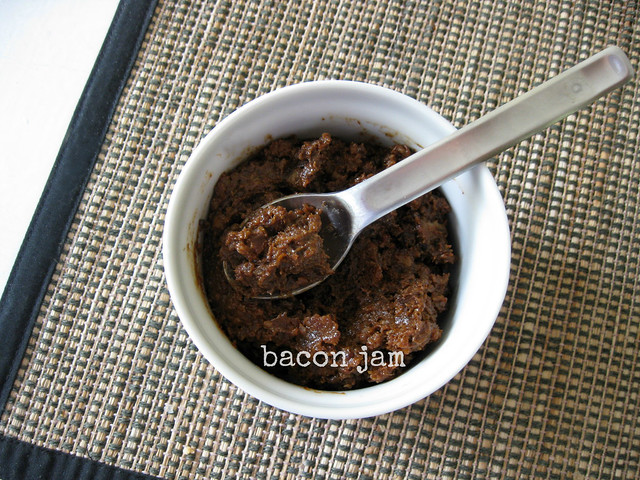
sweet & spicy bacon jam
print recipe
1 & ½ pounds of bacon (uncooked)
half of a medium red onion, finely diced
2-3 TB fresh chopped garlic
2-3 chipotles en adobo (with the sauce too), minced (this gives a mild heat; if you want more heat add more minced chipotles en adobo)
2 TB ketchup
¼ cup + 1 TB light brown sugar
½ ts allspice
½ TB double dutch cocoa powder
1 cup of brewed espresso
¼ cup Coke
1/4 cup apple cider vinegar
a couple dashes of black pepper
Slice up the bacon into 1-inch pieces. Cook in batches until cooked, all fat is rendered. Do not cook bacon till crisp. Drain cooked bacon on paper towels, remove all bacon fat from pan except for a couple tablespoons. Then over
medium heat, cook the onion and garlic until they are just cooked thru and lightly brown.
Add back in the cooked bacon, all spices, all the liquids and all the rest of the ingredients. Turn heat to low, and let simmer for a couple hours until mixture has reduced and almost all liquid is gone. You should get a nice thick-like chili consistency. Place in bowl, cover with plastic wrap and let set up in fridge for at least 4 hours or overnight.
Then place bacon jam into a food processor, and puree for a few pulses. Don’t puree too much, we want to have chunks.
Makes about 1 & ½ cups of jam.
Keeps well in the fridge (tightly covered) for about 5-6 days.
Not sure how it freezes.
__________________________________________________________________________
bacon jam stuffed corncakes
print recipe
If you're willing to use a cornbread mix to make the pancakes then go ahead.
The pancakes are a lot more delicate to flip over, so make them small.
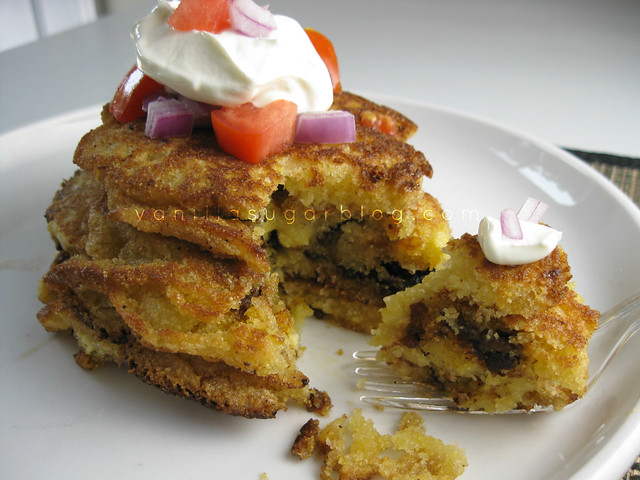
As shown in the photo above, all you need to do to stuff them is put a couple of dollops of bacon jam
on the cornbread batter, let it brown on one side, then gently flip over.
I got about 12-15 small pancakes using the Trader Joe's cornbread mix.
Follow the instructions on the box as you would normally.
Fry up the pancakes in butter.
Serve with chopped veggies like tomatoes, cukes, onions, etc...
And serve with sour cream.
Remember these are savory pancakes, so maple syrup might not taste so great.
If you don't want to use a corn bread mix then use your favorite corn cake recipe.
I do highly recommend serving some hot sauce with these too.
8/24/12
friday links
Happy Friday!
I'm really happy its friday, what a long week.
Starting off this friday links is one very important link.
All about Body Wisdom. Such a great read, so insightful.
I think you'll go back to it again and again like I do.
And if you need ways to boost your self esteem.
I'm beginning to really love Mark Sisson of Mark's Daily Apple.
Here is greatist routine from the people at Greatist.com.
Behold the mighty power of the avocado.
Can you imagine we put this in our personal ads?
Found on Pinterest. 
6 very scary things hiding in your food.
10 life changing tips from Deepak.
Good food on a tight budget. LOVE this site.
Make sure to bookmark this one.
Lyme disease prevention & tips.
Gender differences in fat metabolism.
Have an abundance of zucchini?
Zucchini cookies!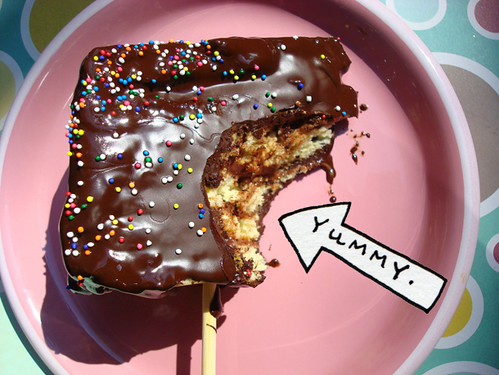
Chocolate covered cake on a stick!
Photo from Cakespy.com
Peanut butter and jelly cookie sandwiches.
Wait till you see the photo. Incredible.
Homemade salt water taffy that you can do. Easy.
I will be trying this.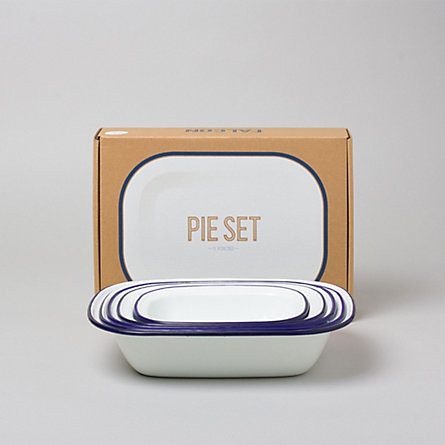
Enamelware pie set.
Just love this website: terrain.com 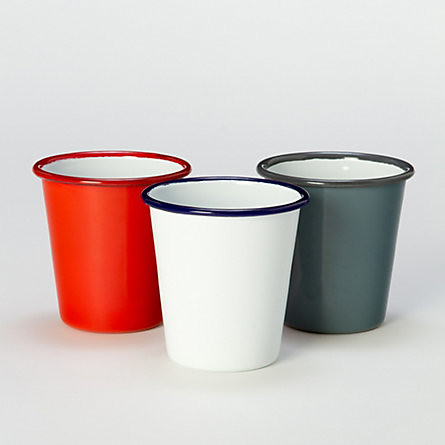
And these tumblers.
9 ways fingernails can reflect your health.
I don't know about this, seems kind crazy to base it all on the health of a fingernail?
The secret pool in the Woolworth Building.
Taste test: Serious Eats does a taste test of the top 9 green juices.
Lose your cooking/baking mojo?
Tips to get it back.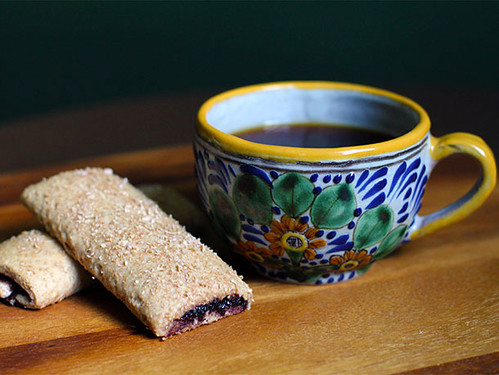
DIY (and far healthier) blueberry cereal bars.
From molly sheridan.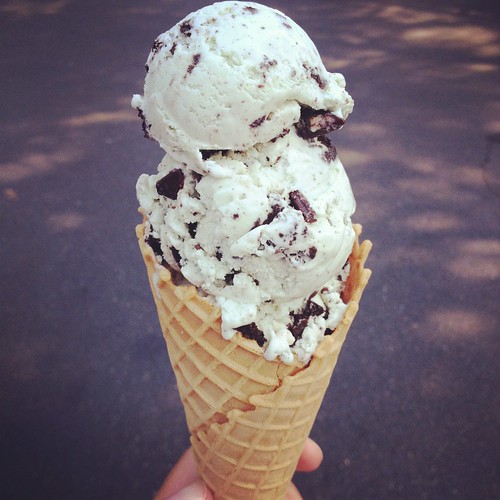
I've been eating ice cream every other day for a few weeks now (mint oreo).
I do love summer.
Milk tea sherbet (from seriouseats.com)
Books I want to read (click on image for info):
And lastly, a HILARIOUS spoof on the new iphone 5.
The iphone for foodies.
Siri can now recognize the food you eat!
Have a great weekend!


8/20/12
key lime meltaways
I remember years ago (dare I say decades?) when I had my first taste of a rum meltaway cookie.
What a great texture, great flavor--and it bothered me to no end what made it so smooth.
Since I was still fairly new at the in's and out's of baking and cooking, I would have never guessed it was cornstarch.
Funny because back then I always thought it was something unique, wild, a rare faraway spice or herb. HA!
Here it was just cornstarch.
Recently, I had another "ah ha baking moment" find when I discovered how to get the perfect popover: cold oven.
And boy does it work. (I learned this from chef john over at Food Wishes).
The best part of learning and creating new recipes, all the new tips and tricks you find along the way; makes you eager to continue on learning all you can in cooking and baking. And for me, helps build confidence in the kitchen.
What are your baking "ah ha" moments?
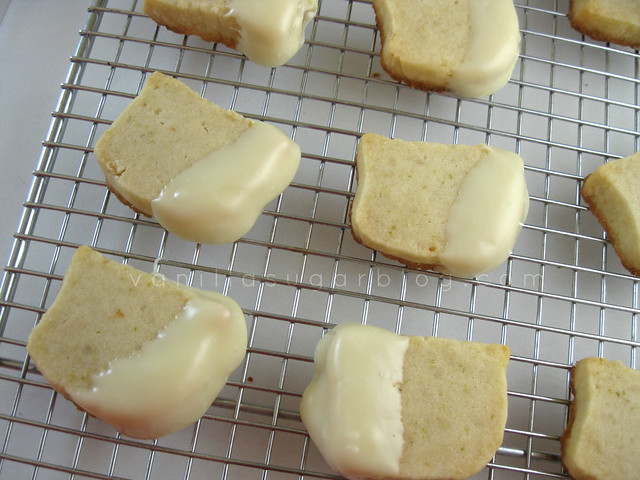
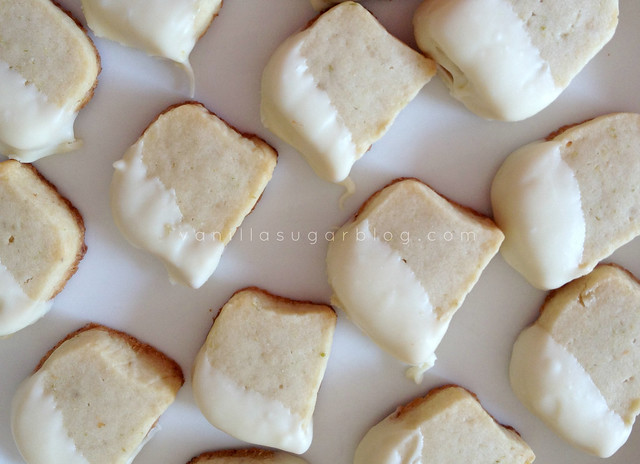
Aren't these so pretty?
Make sure to decorate the chocolate dipped edges with lime zest.
I completely forgot. But trust me when I say the lime zest green color looks stunning against the white chocolate.
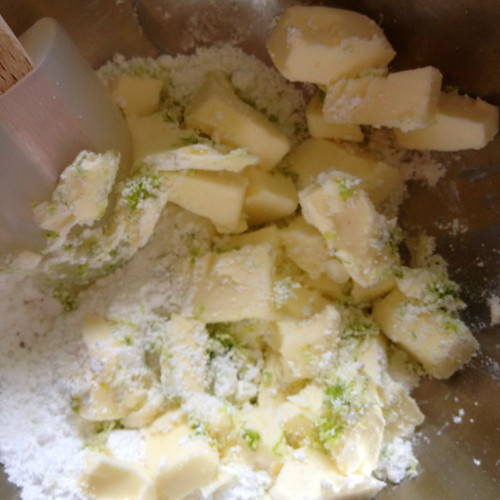
Every great recipe starts with lots of butter doesn't it?
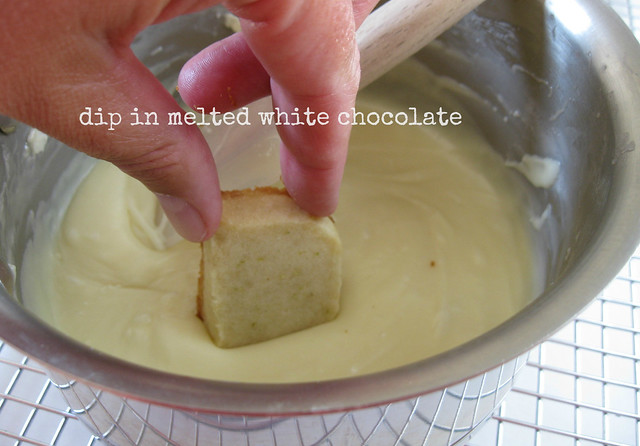
See my tips on tempering the ever difficult white chocolate in the recipe.
Low heat and constant stirring for melting chocolates perfectly.
Remember: you can easily fixed undermelted, but cannot fix overmelted, so go slow.

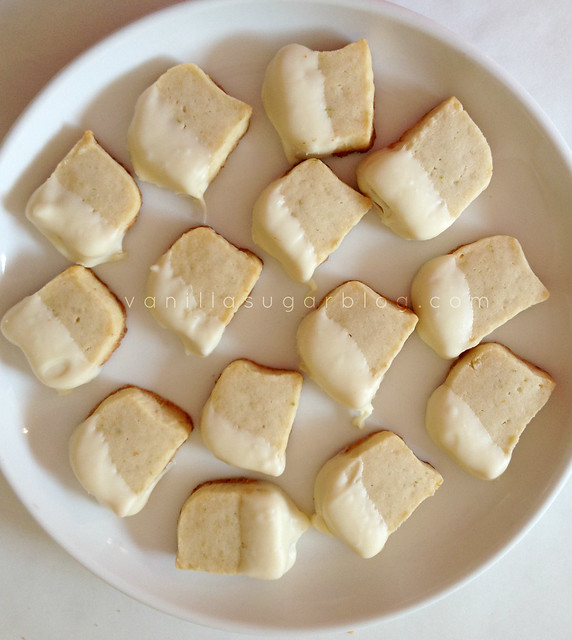
Decorate the edges with lime zest to make them even more stunning!
(I completely forgot this part)
key lime melt-aways with white chocolate
print recipe
13 TB unsalted butter, room temperature
1/3 cup powdered sugar
Grated zest of 2 regular limes (I used about 2 TB zest, use whatever your lime zest taste level is at)
2 TB of fresh key lime juice (regular will work too)
½ TB pure vanilla extract
1 3/4 cups + 2 TB all-purpose flour
2 TB cornstarch
1/4 ts salt
white chocolate dipping:
1 and ¾ cups good quality white chocolate chips
a couple dashes of heavy cream
extra lime zest for sprinkling (I forgot this part)
Cook Notes:
I used key limes for the juice part and regular limes for the zest. The key lime juice is much sweeter and tastier, and the skin of the key lime isn’t that great so that’s why I used regular limes for zest.
Keep in mind the thinner you cut/slice the cookies the more fragile they become, so I stuck with ½ inch thick. If you’re not dipping them in white chocolate then go ahead make them thinner if desired.
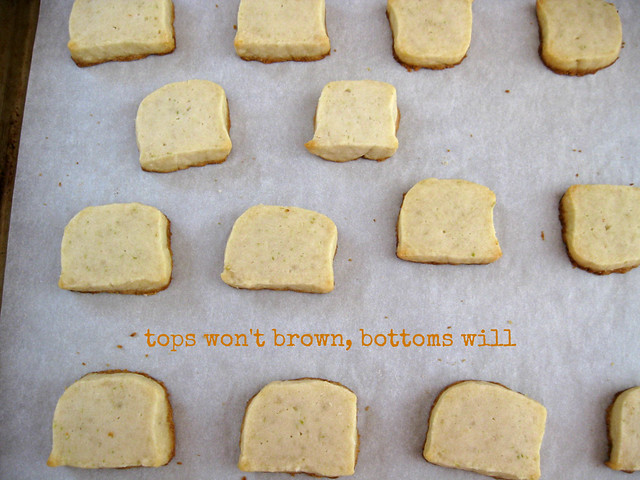
The tops of the cookies do not brown, but the bottoms will—you should not bake cookies past the 15 minute mark.
In a medium bowl, sift the flour, cornstarch, and salt. Set aside.
In a large bowl beat butter and sugar on medium high speed until light and fluffy. Add the lime juice, zest and vanilla and beat the mixture until fluffy. Reduce speed to low and add the flour mixer to the butter. Mix until just combined—once you add the flour do not overmix.
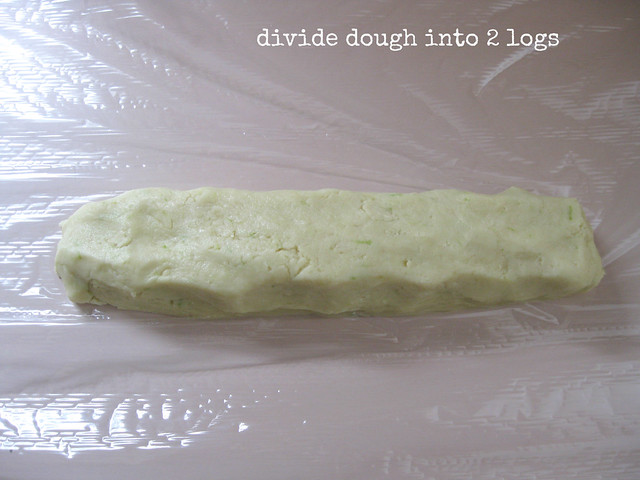
Ready a two 8"x12" pieces of waxed paper or parchment. Divide the dough into two equal portions and roll into two 1.25" diameter logs. Wrap the dough tightly in the waxed paper or parchment. Chill for at least an hour before baking.
Heat the oven to 350°F and line a baking sheet with parchment. Slice the cookies ½ -inch thick and place on the baking sheet.
Bake for 15 minutes, rotating halfway through baking, until the bottoms take on some color. The tops of the cookies will not brown, but the bottoms will.
Let cookies cool completely before dipping.
Temper the white chocolate chips with the heavy cream over a double boiler or whatever method you prefer and works. I do not recommend melting white chocolate in the microwave.
What I do is heat up (barely warm means heat up in this case), over very low heat, the heavy cream, in a small heavy duty sauce pan; add in the white chocolate chips and keep stirring with a spatula. As I’m stirring I take the pan on and off the heat and look for almost all the chips to be dissolved then I take it off heat. Keep stirring till I get a nice glossy, almost thin, taffy like texture. Best thing to do if you’re not sure about tempering white chocolate? Keep stirring and take off heat frequently. You can easily fixed undermelted, but cannot fix overmelted.
Dip one end of the cooled cookies in the white chocolate, place on wire cooling rack to let chocolate harden and excess drip off. Sprinkle them with lime zest for decorations if desired.
Should make 25-35 cookies depending on how thick/thin you slice them.